ROX 12.1 EVO
NAVIGATE SMARTER
PERFORM BETTER
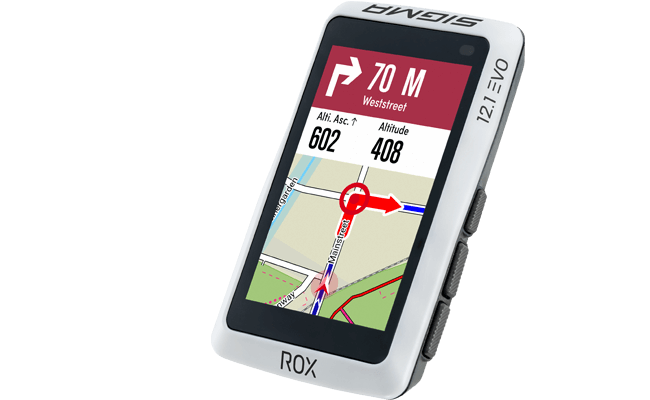


GPS bike computer with map navigation
GPS bike computer with map navigation. Experience unlimited bike/e-bike adventure with the ROX 12.1 EVO! The user-friendly GPS bike computer is the navigation system for anyone who wants to discover the world. On forest floor, gravel, or asphalt, its multifaceted map navigation functions finds the best route for you to get to your destination. The ROX 12.1 EVO records extensive data for each and every ride, letting you take your training to a new level. “Made in Germany” innovation.

Preis-Leistungs-Sieger, Note „gut“ (1,9)
20.11.2023 – Read more
Experience the EVO-lution!

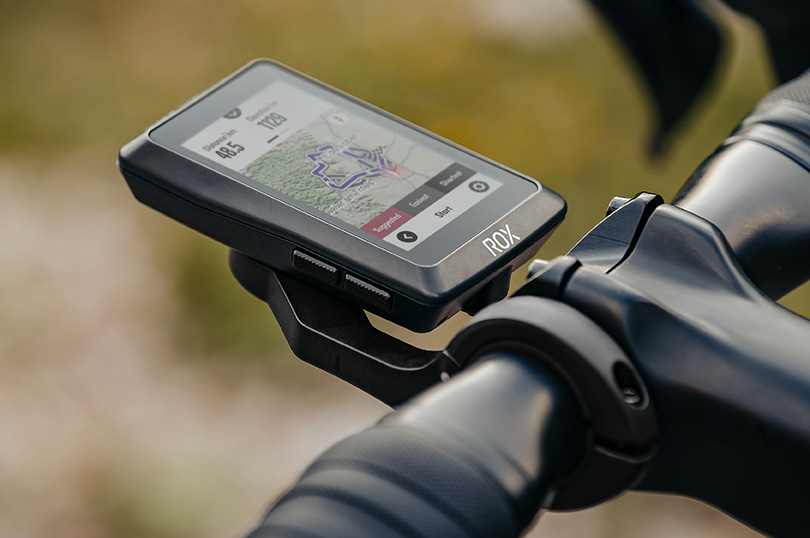
The 110-gram GPS bike computer features a modern, compact design.

You can connect to the SIGMA RIDE app on your smart phone with Bluetooth.

Are you a data freak? You can analyze your ride with the SIGMA RIDE app.

Your ROX can also be connected to even more sensors (such as speed, cadence, or indoor trainers) with ANT+ and Bluetooth.

If you have a serious accident, Crash Alert will detect the problem and alert your emergency contacts.

Get to know the user-friendly, easy-to-read user interface.

Discover the world
Bike-optimized maps
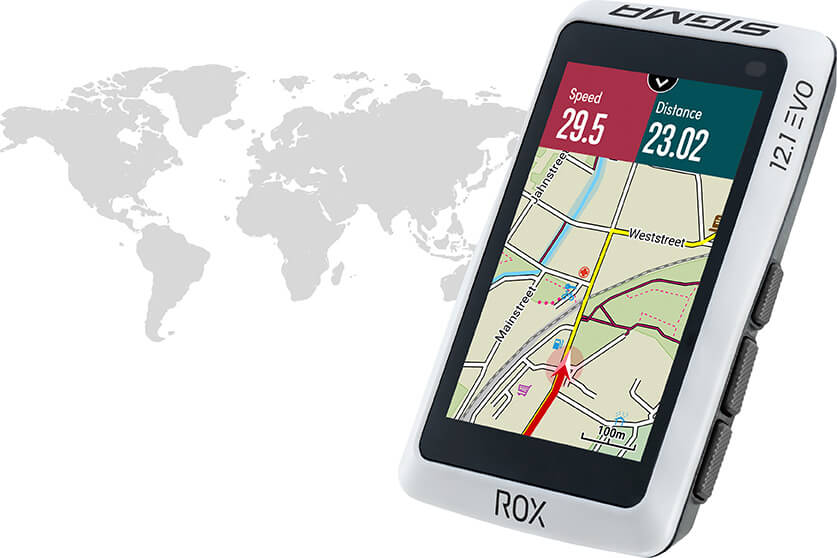
Your ROX 12.1 EVO comes with many pre-installed country maps. So you can get started as soon as you unpack your bike computer! A SIGMA-only proprietary map display ensures that you can find your way around. The maps highlight bike paths and trails to always take you to the best route, no matter where you are or what bike you are using. The compressed maps require little storage, so you can store a number of areas around the world permanently. More maps and regular updates can be downloaded via WiFi free of charge so that you always have the perfect track anywhere.
Innovative map navigation
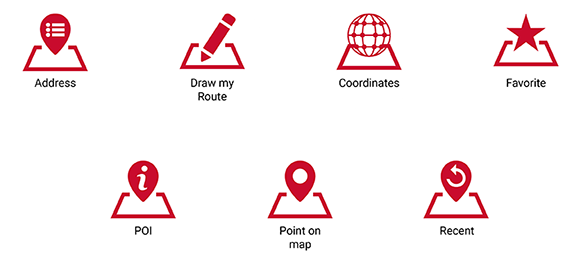
Simply enter an address or routing to a point on the map or a point of interest (POI) – the navigation possibilities are limitless. Your ROX 12.1 EVO uses home navigation to always find your quickest way home. The “Back-to-Start” function takes you back to the beginning of your ride − on the same route if you want. The multifaceted navigation functions can be used independently, of course, without your ROX being connected to the internet or a smart phone.
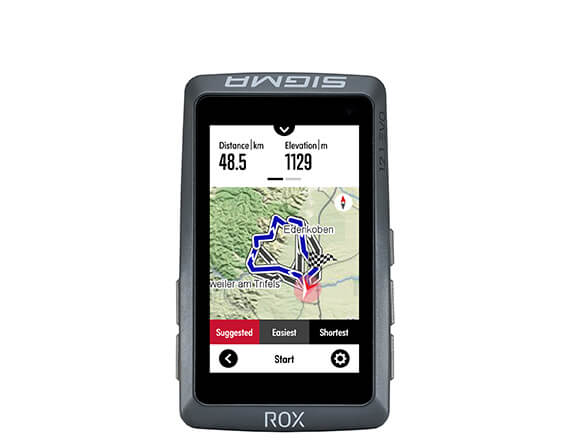
Your routing
You decide for yourself which criteria your route should fulfil. You can choose among three route for your tour: the recommended one, the easiest, or the shortest. The altitude profile is also displayed for each route. You can also specify your route preferences (bike paths, main roads, dirt roads) individually for each sport profile.
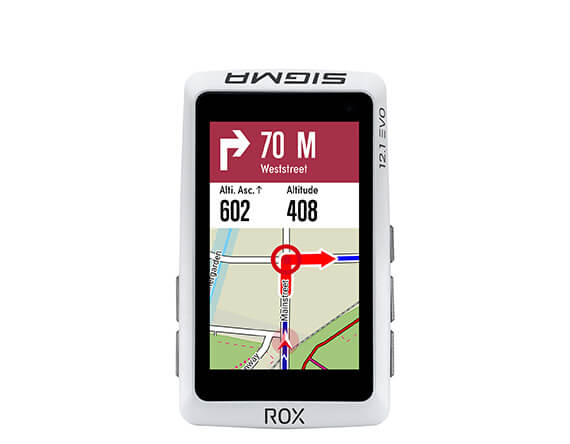
Turn-by-turn navigation
The map can be displayed flexibly according to your needs and offers both large and small views. During navigation, the display shows the route and turn-by-turn directions. A pop-up window with an acoustic signal tells you when to turn next. The distance to the next turn-off and the street name are also displayed.
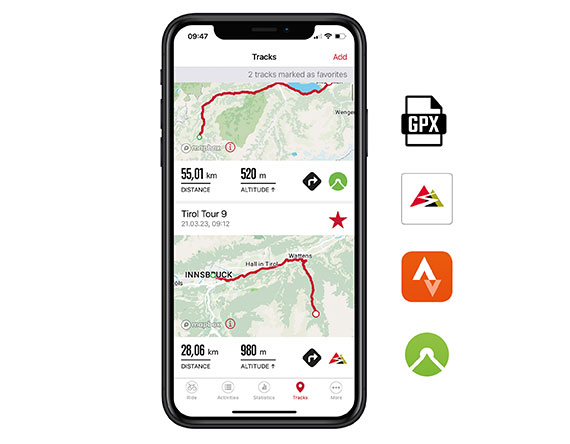
Easy route loading!
Route loading has never been this easy: Load routes from portals such as Strava and komoot or use a .gpx import into the SIGMA RIDE app. You can now call up your routes at any time, receive a good overview, synchronize them with your ROX 12.1 EVO, and head out. Useful Tip: in the “Favourites” menu, you can save your favourite tracks to call them up quickly later.
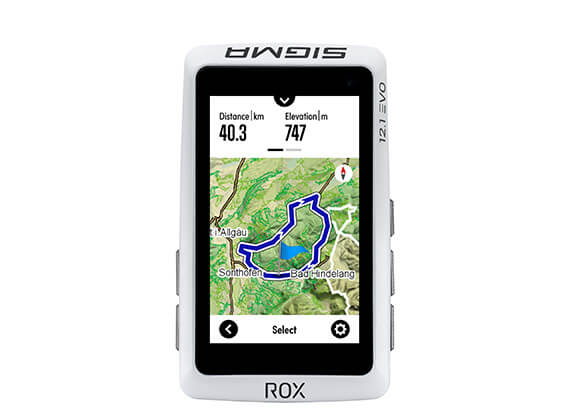
Plan rides ahead of time
Your ROX 12.1 EVO enables you to plan your rides ahead of time. You can plan your next biking vacation from wherever you are – your desk, your couch at home, or anywhere you’re thinking about your next ride. You can then find it in your route list.
DRAW MY ROUTE
A unique feature for all those who like to be surprised. Explore new routes with the unique “Draw my route” function. Just draw one or more lines on the map, and the ROX 12.1 EVO will create a suggested route for you. Are distance and altitude profiles what you want? Then you’re ready to go!
Smart re-routing
Your ROX won’t let you down! If you suddenly change your ride from the suggested route, your ROX will quickly plan a new path to your destination − including re-calculating distance, predicted arrival time, and altitude profile.

Train like a pro
Custom sport profiles
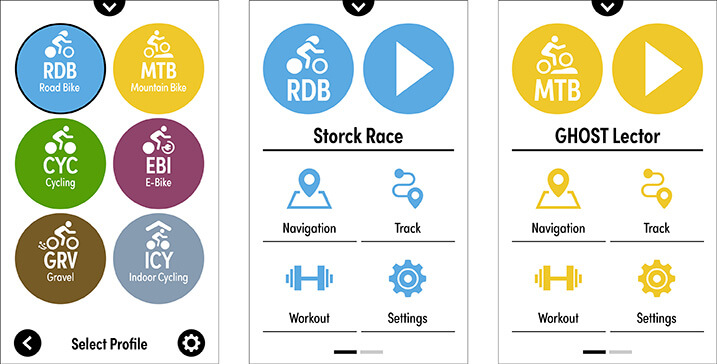
Which tour and which bike will it be today − mountain bike, gravel bike, or racing bike? The six pre-defined and 22 other customizable sport profiles make sure the ROX 12.1 EVO is prepared for any bike adventure. In the individual sport profiles, you can customize your training views, trail preferences, and alarms. The profiles can easily be created and adjusted on the ROX 12.1 EVO or in the SIGMA RIDE app − any time, even during training.
Personal training views
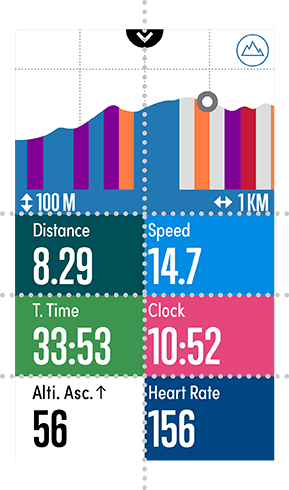
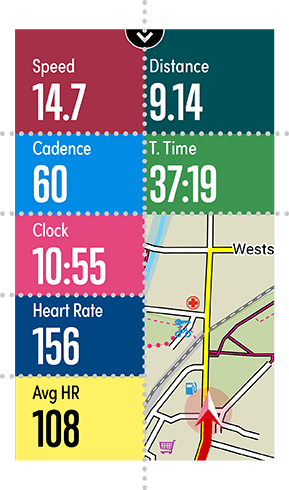
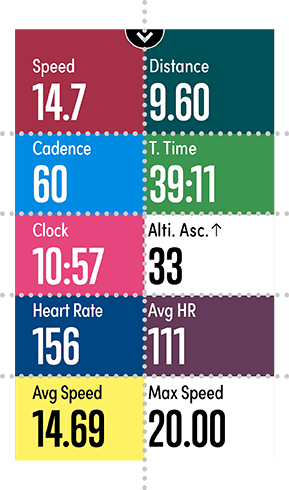
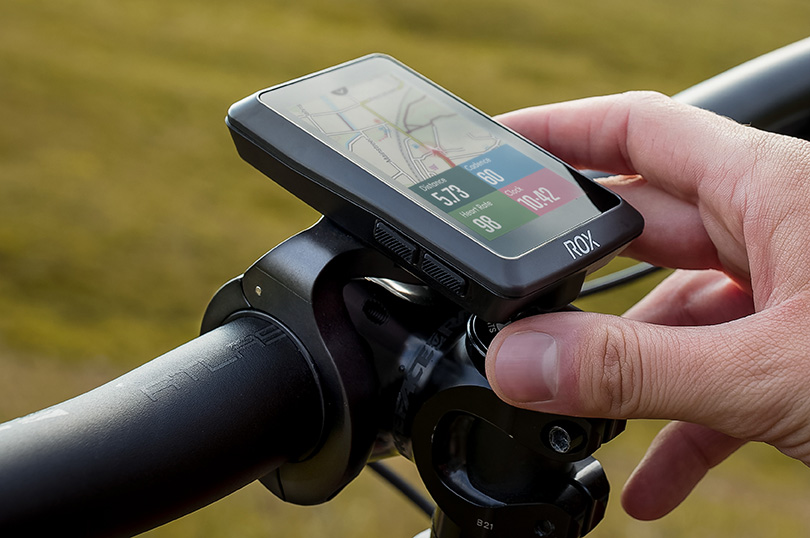
The ROX 12.1 EVO’s six training views give you maximum flexibility. You can configure them however you want and highlight the data fields with different colors. Depending on how many values you want to display (up to ten), you will get different layout suggestions. A total of 30 layouts are available. Would you like to have distance displayed instead of altitude? No problem − you can change your training views easily during your ride. The ROX 12.1 EVO also has views for workout, navigation, FE-C smart trainer, and laps.

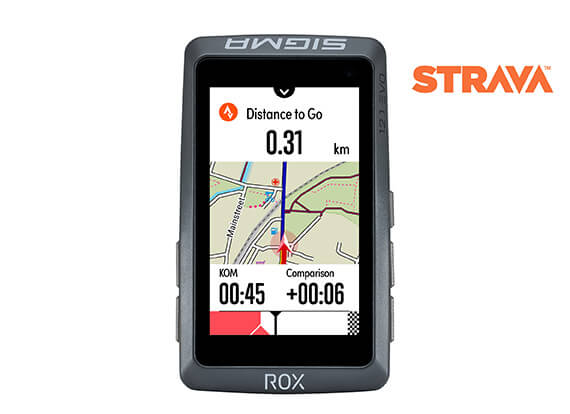
Strava Live segments
Use the RIDE app to load Strava Live segments to your ROX 12.1 EVO and measure yourself against other riders. Would you rather keep an eye on the track or your values while you are challenging the KOM/QOM (King/Queen of the Mountain)? You can decide!
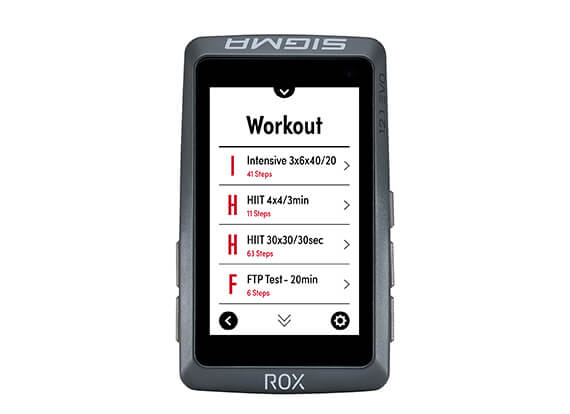
An overview of your workouts
The ROX 12.1 EVO helps structure your training. The most important workouts are already pre-installed. You can also upload workouts from portals such as TrainingPeaks to your ROX 12.1 EVO. Just import them with the RIDE app and start training!
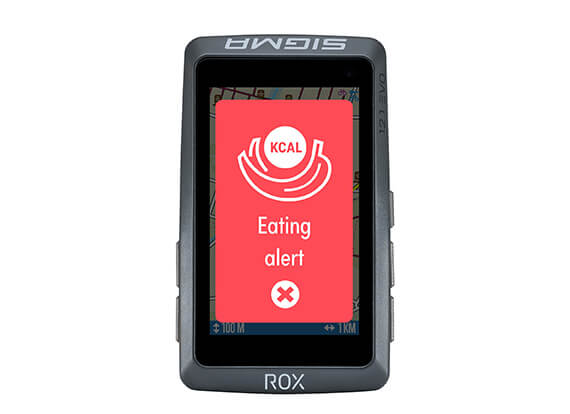
Drinking and eating alarms
For optimum energy supply during competition and training, the ROX 12.1 EVO reminds you to eat and drink at points you determine in advance, such as at certain times or distances. You can customize another alarm with your own text − you get to decide whether it appears only once or is repeated.
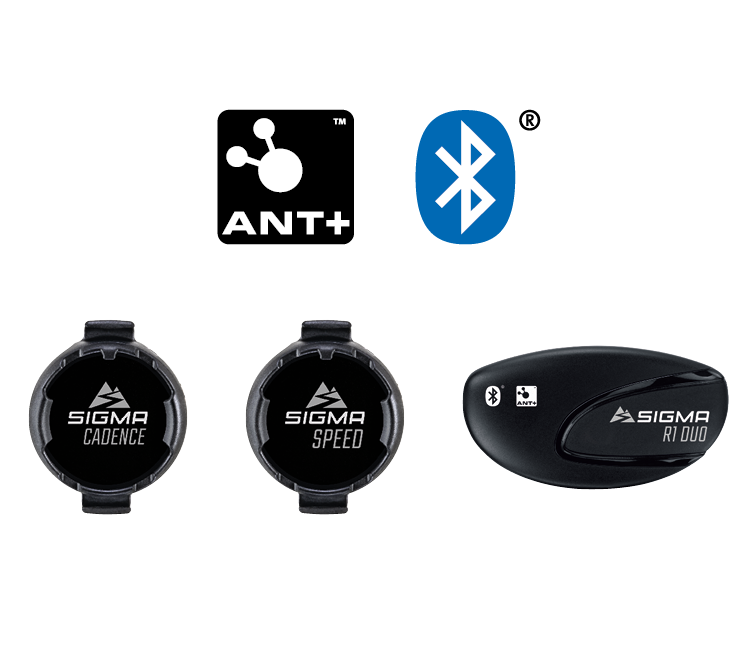
Would you like to record other data about your training? ANT+ and Bluetooth make it extremely easy for you to reliably combine and link external sensors to measure speed, cadence, and heart rate.
You can get the ROX 12.1 EVO in a set with our new magnet-free speed and cadence sensors and our chest strap (also available as accessories). Your ROX 12.1 EVO can also be paired with other sensors such as your electronic gear changes or radar.
Speed measurement
SRAM-eTap-compatible
Cadence measurement
Shimano-Di2-compatible
Heart rate measurement
Smart Trainer (ANT+)
Watt measurement with power meter
Radar
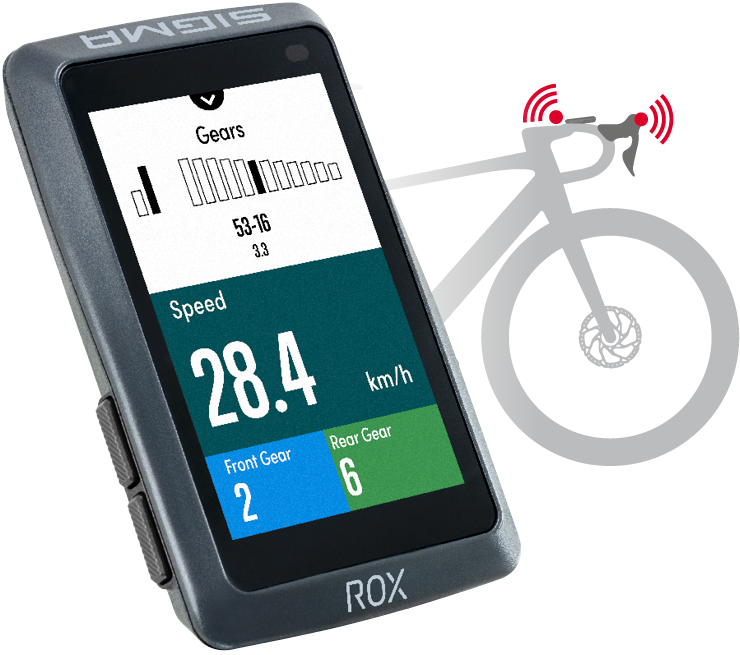
Your ROX 12.1 EVO is compatible with Shimano Di2 gear shifting. You can use the D-Fly buttons on the electronic gear switch to control your bike navigation system while you are riding. For instance, you can switch training screens easily without taking your hands off the handlebars.
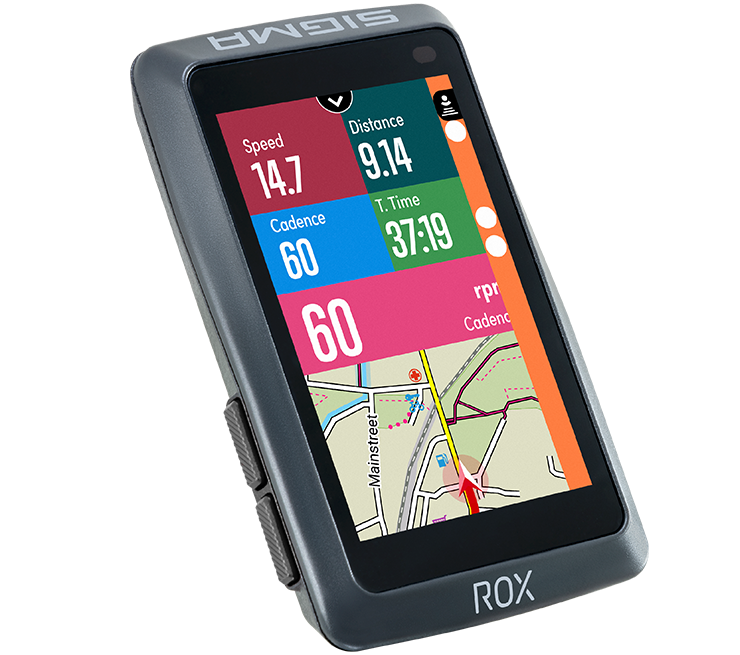
Connect your ROX 12.1 EVO to a radar and get information about approaching vehicles.
The bike radar serves as your digital rear-view mirror and detects approaching vehicles, forwarding the data to the ROX in real time. This enables you to keep an eye on the traffic behind you, estimate the speed of approaching vehicles, and adjust your riding behaviour accordingly.
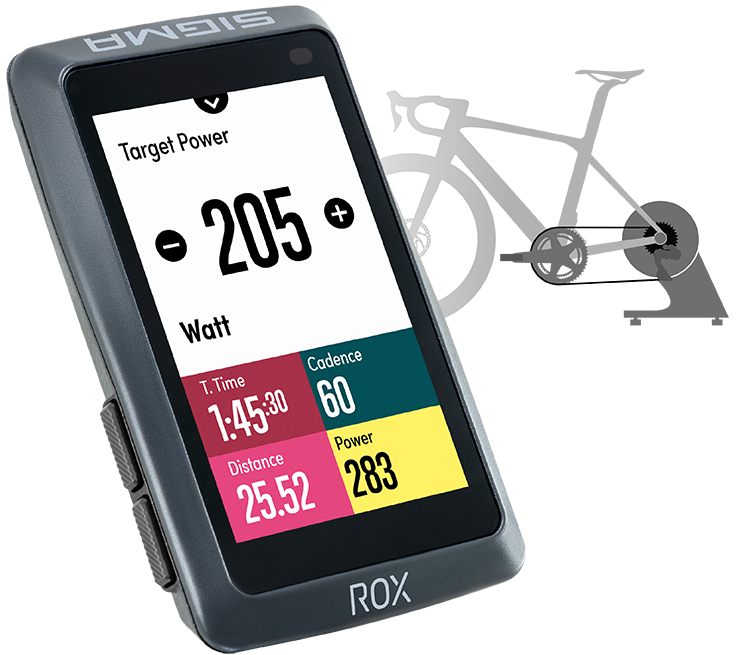
Are you up for some indoor training?
Connect the ROX 12.1 EVO to your smart trainer or stationary bicycle trainer. This lets you use the bike computer’s numerous training features during indoor training as well. If you want, your ROX 12.1 EVO takes control of your stationary training if you are not using a Zwift.
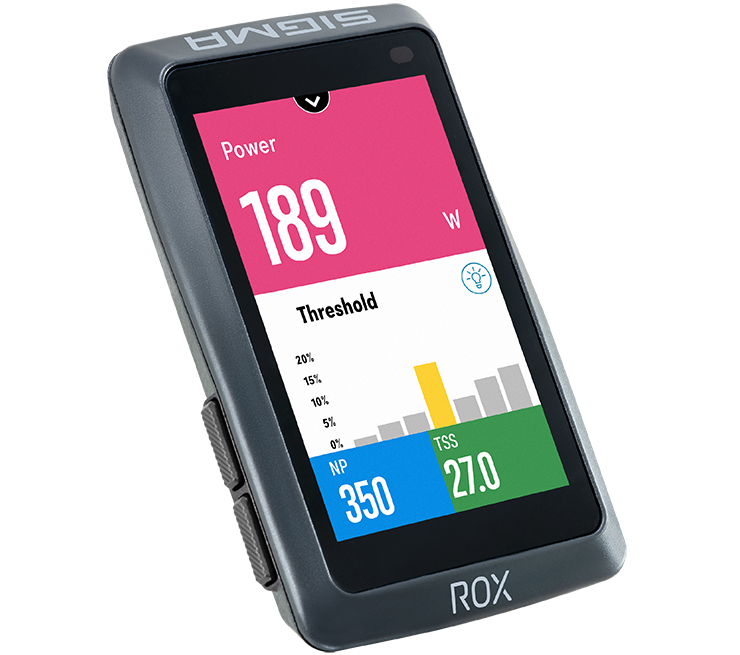
Powermeters have become indispensable for cycling. This training instrument enables you to measure your performance precisely for targeted improvement. In addition to general power meter values, your ROX 12.1 EVO displays specific values such as TSS®, NP®, and IF®. It also offers you the OCA and OCP values for a Rotor 2INpower, INPower, or INSpider. In addition to the numbers, a graphical representation is available in your training view. Normalized Power (NP®), Intensity Factor (IF®), and Training Stress Score (TSS®) are registered trademarks of Peaksware, LLC.
Training assessment at a glance
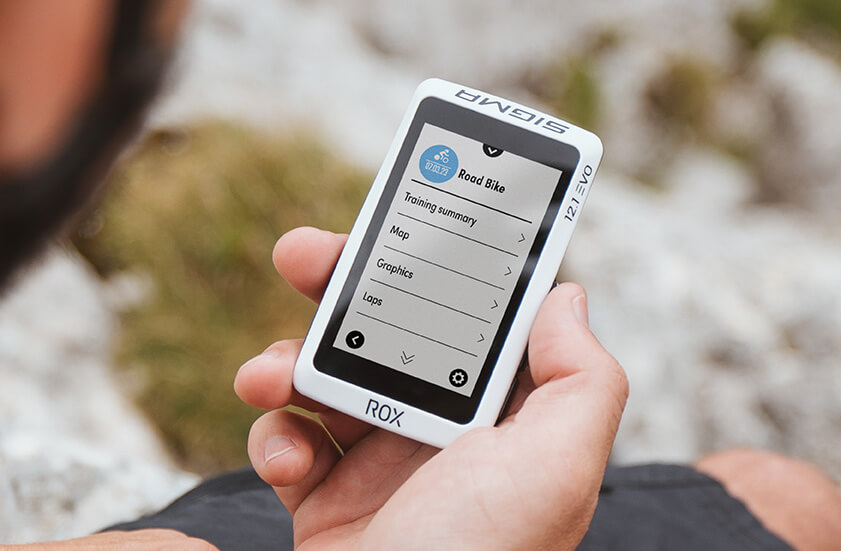
For a quick evaluation on the device, you can specifically access your training sessions under the “My activities” menu item. All values and graphs and the map view will help you to analyse your training. What was your longest tour, and what is your speed record? The “Personal best” menu point shows you a list of your successes, great and small − and there is a trophy!
And if that’s not enough, the free SIGMA RIDE app gives you the exact details of each tour and statistics that enable you to compare your progress over the last few weeks, months, or even years.

E-BIKE READY
E-bike-compatible
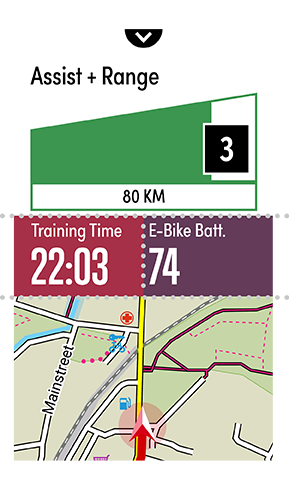
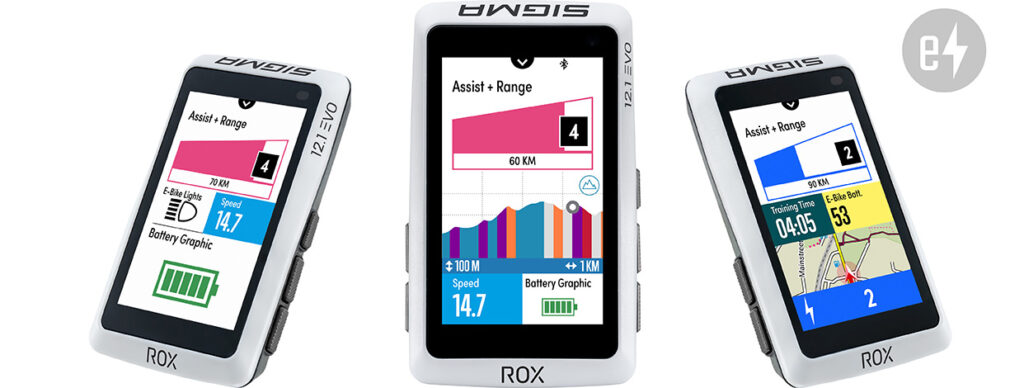
The ROX 12.1 EVO is the perfect partner on your e-bike rides as well. It can be paired easily with many e-bikes and show specific values such as range, battery level, and support level, depending on the e-system connected. The display also shows the gear change recommendation – saving you energy and battery charge.
The SIGMA RIDE app also supports assessment of your e-bike tour, of course. Graphic profiles and heat maps use a variety of colours to visualise how much of the route was ridden at what support level, the battery status over the course of the route, and much more.
Check to see if your bike is compatible with the ROX 12.1 EVO:

Smart connection!
An eye on all data with the SIGMA RIDE app
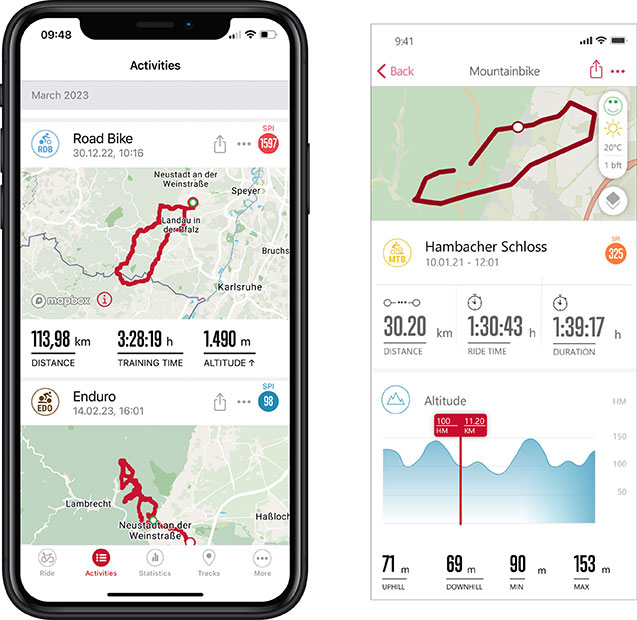
With the free SIGMA RIDE app for iOS and Android, you can assess your tours anywhere, anytime. You can use the app to transfer your data with Bluetooth from the ROX 12.1 EVO to your smart phone, collect your training values, and keep an eye on your statistics for recent weeks, months, or even years. This not only is fun, but ensures lots of motivation. The RIDE app is a smart companion for the ROX 12.1 EVO and can also help you adjust the device to be more convenient for you, manage your routes from various platforms, and transfer them to your ROX 12.1 EVO.

Optimally networked
Plan your routes in portals such as Strava and komoot and use the SIGMA RIDE to transfer them directly to your ROX 12.1 EVO. Successes can be easily shared to your favourite social media platforms such as Strava, komoot, TrainingPeaks, Facebook, Twitter, and WhatsApp. Users of the SIGMA RIDE app for iOS can integrate Apple Health and share routes and training values there as well.
Stay connected
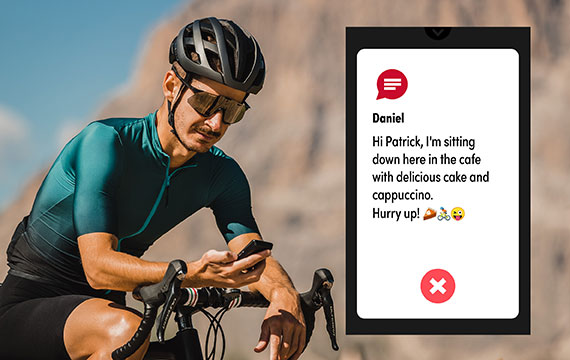
Smart notifications connect your smart phone to your bike computer even while you’re riding. Notifications of incoming calls, messages, and e-mails appear automatically on your display. If friends and family send you emojis for motivation, they show up there as well.
SAFETY FIRST
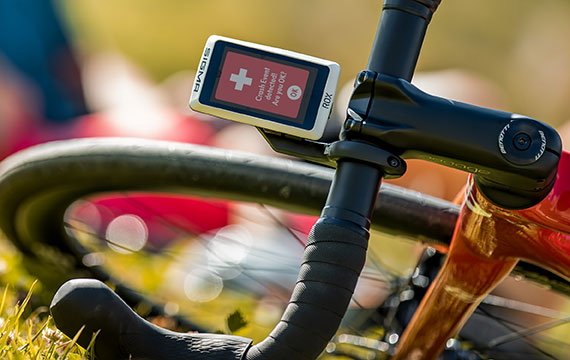
The ROX 12.1 EVO is also helpful in dangerous situations: If you have an accident, it automatically detects the fall and gives you 30 seconds to confirm that you’re OK. If there is no confirmation, the SIGMA RIDE app automatically sends an SMS to your emergency contacts and gives them your GPS data. You can also save emergency information such as blood type, name, and medication to your device.

Easy handling
Modern user-friendly interface
Switch it on, and you immediately know where to go: Large buttons and a clean, modern design make the ROX 12.1 EVO very user-friendly. Optimized typography makes the device very easy to read.
Smart shortcut menu
You can reach the practical shortcut menu by swiping down once. The menu shows you relevant functions such as Back-to-Start and battery charge and adapts dynamically when you pair a sensor, for instance.
Favorites always available
Your navigation favorites are available in the Favorites menu. Just swipe up on the display and have the computer navigate you home or call up your most recent destinations or favourite places.
Flexible display
Would you prefer for the display to show the ascending and descending altitude or turn-by-turn navigation? No problem: You can change the displayed training values during your ride and highlight them in colour – without ending the current data display.
Touch and buttons for maximum ease of use

Enjoy powerful hardware
Small and compact, but powerful
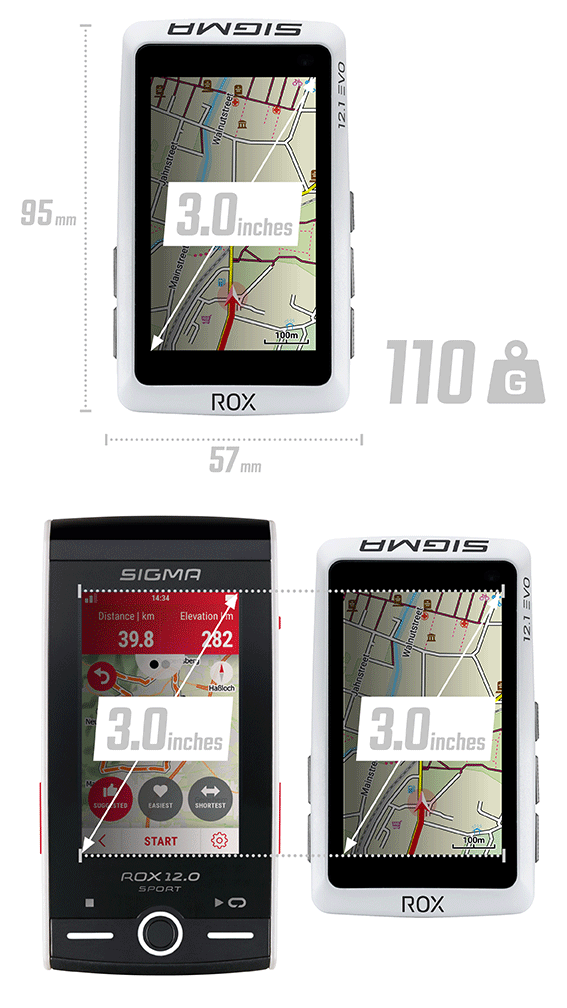
The three-inch touch display fits perfectly into the ROX 12.1 EVO’s modern design. Its size makes the display easy to read even during a ride. And it weighs only 110 grams.
Powerful hardware
Change the display view, zoom in and out, calculate a track, or re-route: Its powerful hardware makes using the ROX 12.1 EVO easy and lightning fast.
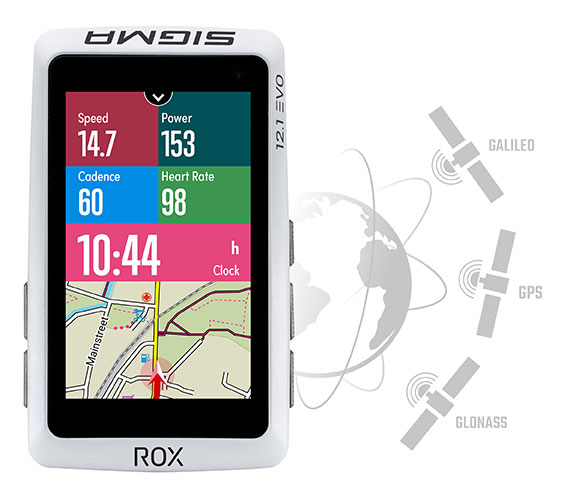
Get started quickly with GNSS
Switch it on, get your bike ready, and go: GPS, GLONASS, Galileo, and BeiDou (GNSS) provide up to 99 channels to check your current position on. They ensure the fastest possible position fix so that you can start right away.
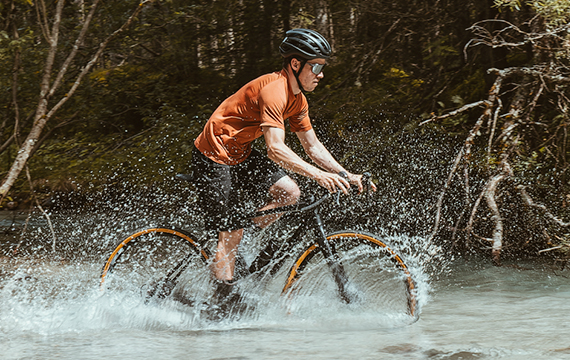
Outdoor pro
The ROX 12.1 EVO can handle all sorts of weather! It is protected from dust and water according to IP67. Its tough housing and display can handle minor falls.
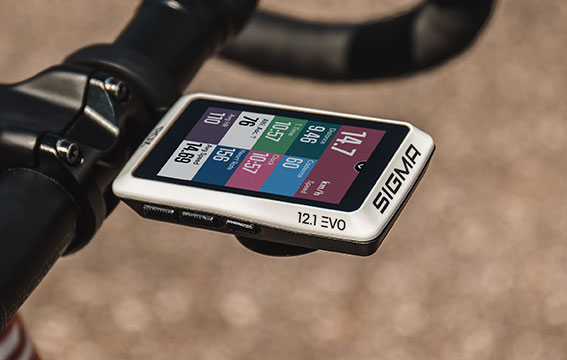
Transflective display
The ROX 12.1 EVO display is perfectly adjusted for outdoor use in full sunlight. The intelligent backlight makes sure the display is easy to read even in poor light conditions. In strong sunlight, the advantage over your smart phone quickly becomes obvious: ideal readability at low energy consumption.
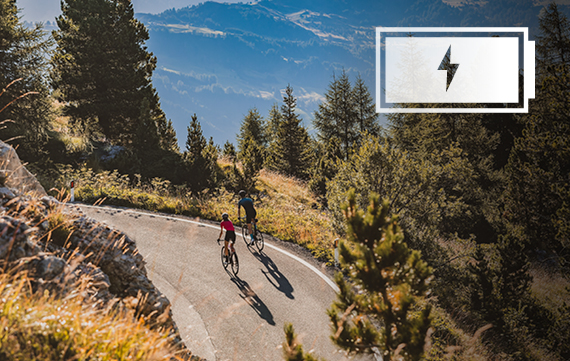
Extra-long rides
Your ROX 12.1 EVO’s powerful battery gives you lots of range on bike tours. The precise battery life depends on how you use the computer. An overview is available here. The battery level is displayed in your ROX 12.1 EVO’s shortcut menu.
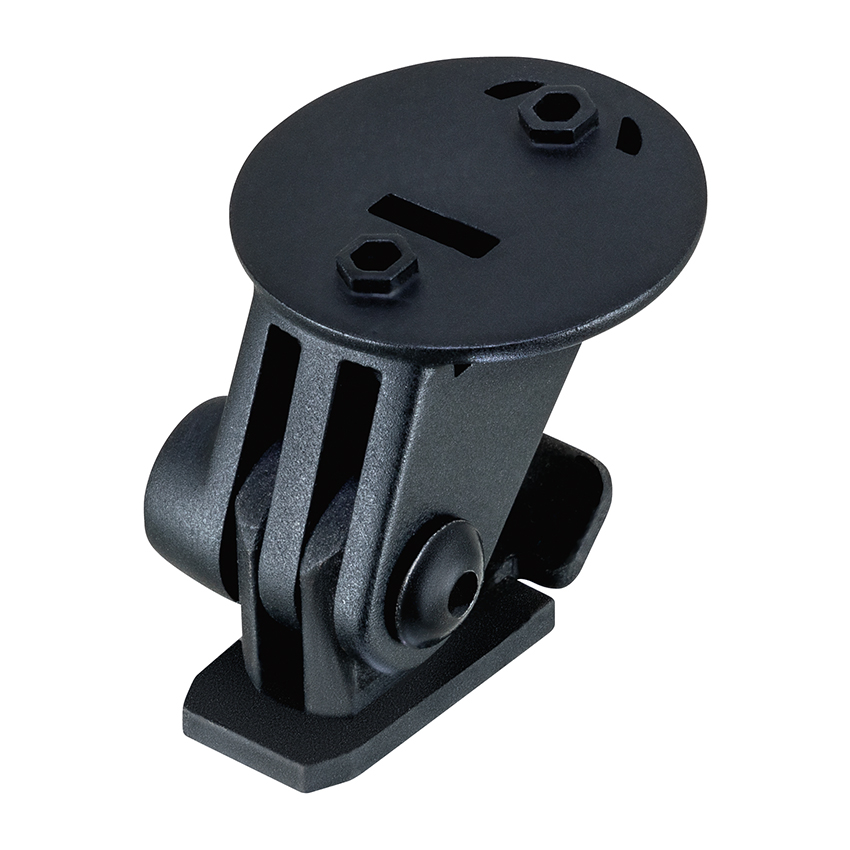
The Long Butler (included in delivery) gives your ROX 12.1 EVO the ideal position on your handlebars. You can view the display perfectly! It can be mounted on handlebars with diameters from 25.4 to 31.8 mm in a few easy steps. Curved handlebars? Use the 3D rubber pads to perfectly set-up your ROX 12.1 EVO.
The Over-Clamp Butler allows perfect ROX 12.1 EVO alignment, even on a short stem. For instance, the bike computer can be positioned centrally above the stem at the level of the handlebars. This ensures space and order on your handlebars. The Over-Clamp Butler is available as an accessory and fits handlebars of 31.8 and 35 mm diameter.

Features & functions
| General | ||||||||||||||||||||||||||||||||||||||||||||||||||||
|---|---|---|---|---|---|---|---|---|---|---|---|---|---|---|---|---|---|---|---|---|---|---|---|---|---|---|---|---|---|---|---|---|---|---|---|---|---|---|---|---|---|---|---|---|---|---|---|---|---|---|---|---|
|
||||||||||||||||||||||||||||||||||||||||||||||||||||
| Navigation | ||||||||||||||||||||||||||||||||||||||||||||||||||||
|
||||||||||||||||||||||||||||||||||||||||||||||||||||
| Sensors | ||||||||||||||||||||||||||||||||||||||||||||||||||||
|
||||||||||||||||||||||||||||||||||||||||||||||||||||
| Training | ||||||||||||||||||||||||||||||||||||||||||||||||||||
|
||||||||||||||||||||||||||||||||||||||||||||||||||||
| Data analysis | ||||||||||||||||||||||||||||||||||||||||||||||||||||
|
||||||||||||||||||||||||||||||||||||||||||||||||||||
| Basic functions | ||||||||||||||||||||||||||||||||||||||||||||||||||||
|
||||||||||||||||||||||||||||||||||||||||||||||||||||
| Altitude measurement | ||||||||||||||||||||||||||||||||||||||||||||||||||||
|
||||||||||||||||||||||||||||||||||||||||||||||||||||
| Cadence functions | ||||||||||||||||||||||||||||||||||||||||||||||||||||
|
||||||||||||||||||||||||||||||||||||||||||||||||||||
| Heart rate functions | ||||||||||||||||||||||||||||||||||||||||||||||||||||
|
||||||||||||||||||||||||||||||||||||||||||||||||||||
| Power functions | ||||||||||||||||||||||||||||||||||||||||||||||||||||
|
||||||||||||||||||||||||||||||||||||||||||||||||||||
| E-Bike functions | ||||||||||||||||||||||||||||||||||||||||||||||||||||
|
||||||||||||||||||||||||||||||||||||||||||||||||||||
| Indoor trainer functions | ||||||||||||||||||||||||||||||||||||||||||||||||||||
|
||||||||||||||||||||||||||||||||||||||||||||||||||||
| Automatic lap functions (time or distance based) | ||||||||||||||||||||||||||||||||||||||||||||||||||||
|
||||||||||||||||||||||||||||||||||||||||||||||||||||
| Manual lap functions | ||||||||||||||||||||||||||||||||||||||||||||||||||||
|
||||||||||||||||||||||||||||||||||||||||||||||||||||
| Navigation functions | ||||||||||||||||||||||||||||||||||||||||||||||||||||
|
||||||||||||||||||||||||||||||||||||||||||||||||||||
| Electronic shifting | ||||||||||||||||||||||||||||||||||||||||||||||||||||
|
||||||||||||||||||||||||||||||||||||||||||||||||||||
| Status functions | ||||||||||||||||||||||||||||||||||||||||||||||||||||
|
||||||||||||||||||||||||||||||||||||||||||||||||||||
Service
-
Tutorial videos
-
ROX 12.1 EVO - Basic Operations
You are currently viewing a placeholder content from YouTube. To access the actual content, click the button below. Please note that doing so will share data with third-party providers.
More Information -
ROX 12.1 EVO - E-Bike connection
You are currently viewing a placeholder content from YouTube. To access the actual content, click the button below. Please note that doing so will share data with third-party providers.
More Information -
ROX 12.1 EVO - Importing Komoot and Strava tracks on the device
You are currently viewing a placeholder content from YouTube. To access the actual content, click the button below. Please note that doing so will share data with third-party providers.
More Information -
ROX 12.1 EVO - Importing Strava Live Segments on the device
You are currently viewing a placeholder content from YouTube. To access the actual content, click the button below. Please note that doing so will share data with third-party providers.
More Information -
ROX 12.1 EVO - Menu Navigation
You are currently viewing a placeholder content from YouTube. To access the actual content, click the button below. Please note that doing so will share data with third-party providers.
More Information -
ROX 12.1 EVO - Navigation functions
You are currently viewing a placeholder content from YouTube. To access the actual content, click the button below. Please note that doing so will share data with third-party providers.
More Information -
ROX 12.1 EVO - Pairing a powermeter
You are currently viewing a placeholder content from YouTube. To access the actual content, click the button below. Please note that doing so will share data with third-party providers.
More Information -
ROX 12.1 EVO - Pairing to a smartphone
You are currently viewing a placeholder content from YouTube. To access the actual content, click the button below. Please note that doing so will share data with third-party providers.
More Information -
ROX 12.1 EVO - Pairing with radar
You are currently viewing a placeholder content from YouTube. To access the actual content, click the button below. Please note that doing so will share data with third-party providers.
More Information -
ROX 12.1 EVO - Sensor Connection
You are currently viewing a placeholder content from YouTube. To access the actual content, click the button below. Please note that doing so will share data with third-party providers.
More Information -
Connect REMOTE ONE & ROX 12.1 EVO
You are currently viewing a placeholder content from YouTube. To access the actual content, click the button below. Please note that doing so will share data with third-party providers.
More Information
-
-
Manual
-
ROX 12.1 EVO - General information
How do I perform a tour data reset?
After completing your tour, please press the save icon to save the activity. To delete the activity, press the recycle bin and confirm the deletion.Manage memory
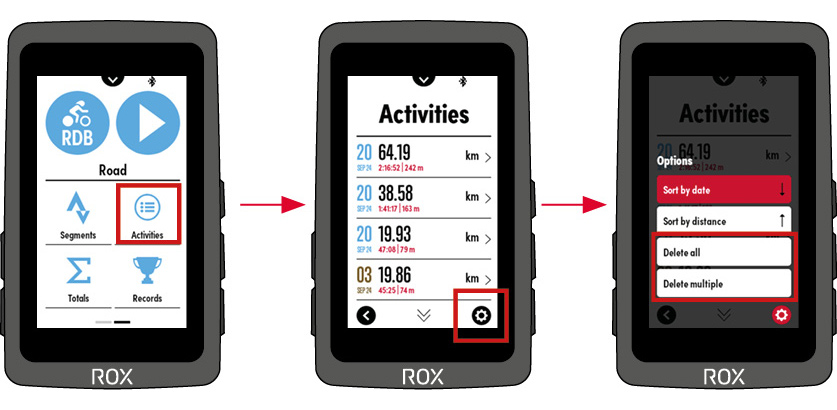
- Delete activities
Activities can be deleted directly on the ROX 12.1 EVO. To do this, go to Activities and then press the cogwheel at the bottom right. Here you can decide whether you want to delete all activities or just individual ones. - Memory
The ROX 12.1 reports automatically as soon as there is only a small amount of memory available. You can then delete activities, tracks or maps that you no longer need in order to empty the memory again.
Description of the HR zones
For better training control, HR zones are displayed for various training areas, which are derived from the individual maximum heart rate.
The zones can be customised.Range Per cent of maximum heart rate Meaning 1 (Recover) <60% Relaxed, easy ride. Low load 2 (Cardio) 61%-70% Comfortable ride 3 (Fitness) 71%-80% A slightly more strenuous ride, good training for the cardiovascular system. 4 (Performance) 81%-90% Fast ride that is more demanding. 5 (Speed) 91%-100% Maximum performance that can only be maintained for a short time. How do I delete my sport profiles?
Open the SIGMA RIDE APP and select the device you are using.
In the Sport profiles tab, you can delete the corresponding sport profile by swiping from right to left.How do I recognise whether the sensors are connected via ANT+ or BLE?
You can display the connected sensors under Settings->Connection->Connect sensor. Depending on the connection, either ANT+ or BLE is displayed to the left of the sensor.How can I set the time zone and time of day?
Time zones / time – Every time you switch on the device and acquire satellite signals or synchronise the device with your smartphone, it automatically determines the time zone and the current time.Can I also use third-party mounts?
Only use the mount from SIGMA SPORT.How do I add my gear ratio to my connected electronic circuit?
If incorrect values are transferred from your electronic gear system to the gear ratio, you can change this by selecting your gear system in the settings under Connections->Connect sensors->Connected sensors. You can then change the number of teeth on the front chainrings and the cassette under Gear settings.How does the Crash Alert work?
The ROX can use acceleration sensors to recognise whether you are involved in an accident. If a crash is detected, a message appears on your ROX asking whether everything is OK. If this question is not answered, the ROX displays the medication you have stored. In addition, if a connection to the RIDE app is active, an automatic text message with the latest position data is sent to your stored emergency contacts. - Delete activities
-
Assembly ROX 12.1 EVO
-
GPS MOUNT
-
Long Butler
Please note that our ROX devices have only been tested in the laboratory and in the field in conjunction with original SIGMA mounting systems. Accordingly, we can only grant guarantee or warranty claims for damage resulting from the connection of the bike computer to a mounting system for devices connected to original SIGMA mounting systems.
-
FIRST START SPEED / CADENCE TRANSMITTER
-
Speed
-
CADENCE TRANSMITTER
-
HEART RATE TRANSMITTER
-
-
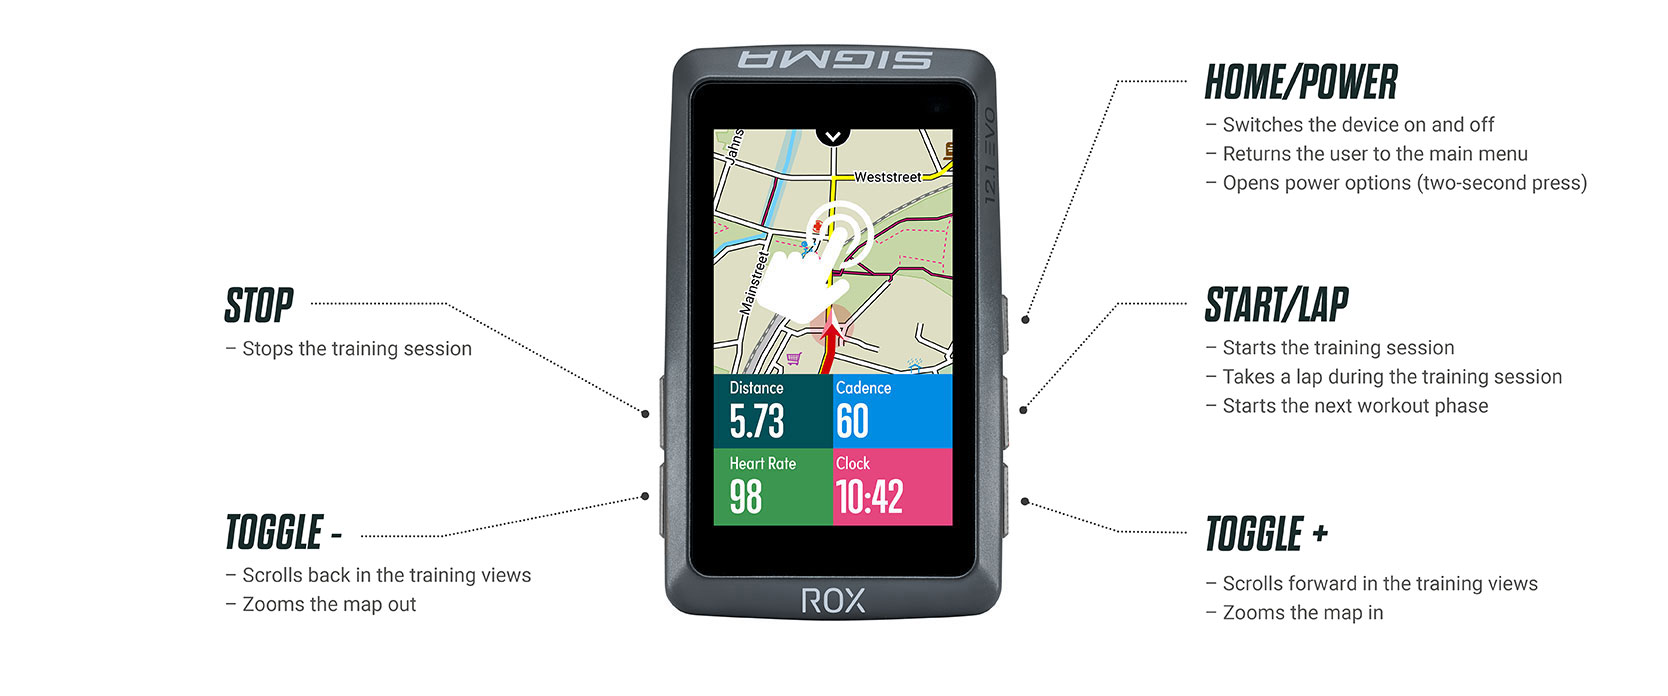
Buttons ROX 12.1 EVO
-
First Start ROX 12.1 EVO
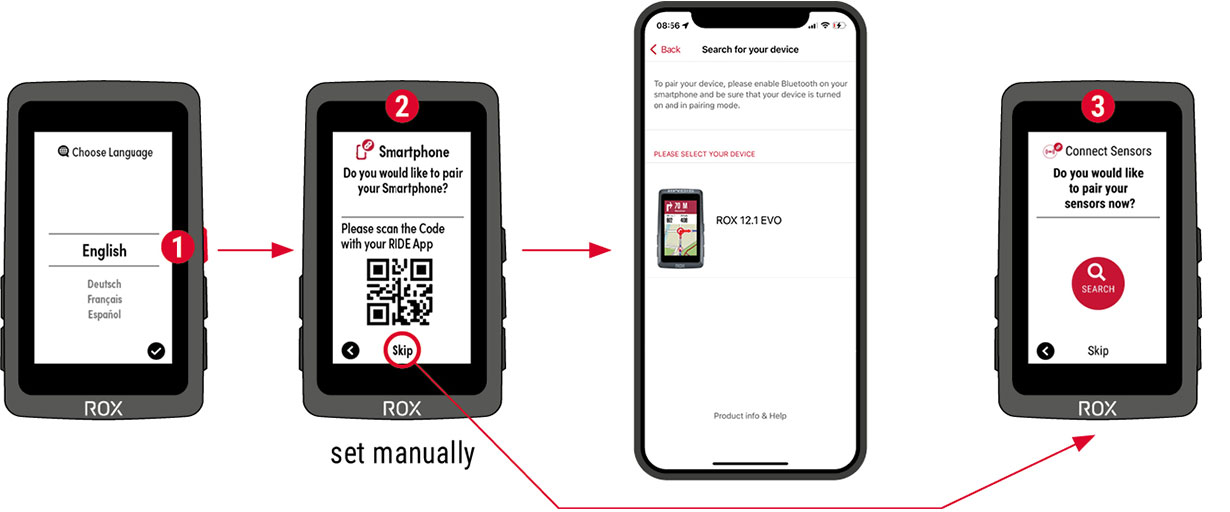
-Press and hold the RIDE button for 5 seconds to activate.
Connect the RIDE app or configure the general settings of your device manually.
Select whether you want to add sensors.
Finish the initial setup.
TIP: The APP offers you many functions for setting up and customizing the ROX 12.1. For more information on the app’s functions, see CHAPTER SETTING CONNECTIONS > RIDE APP.
-
Training with the ROX 12.1 EVO
Every time you turn on the device, the ROX 12.1 EVO starts in the home screen. The last sport profile used is always loaded. If you want to change the sport profile, you must do this before starting the training.
If you have switched on GPS in the active sport profile (this is already the case with most profiles in the delivery state), the ROX 12.1 EVO starts searching for GPS satellites directly after switching on.
-
BEFORE TRAINING
Homescreen
On the home screen you have access to all functions of the ROX 12.1 EVO.
From the start of the training, the navigation functions, the settings, Strava segments, the sport profile selection, up to your best performances, you can see all important functions here.SPORT PROFILES
To quickly switch between the different sport profiles, you only need to click on the sport profile on the home screen and the desired profile can be selected for the ride.
Under Settings->Sport Profiles, the various settings for the available sport profiles, such as bike circumference, food and drink alarms, and many more can be made. Furthermore, new sport profiles can be added via the “gear icon”.These settings can also be made via the RIDE app. There is also the possibility of deleting the sport profiles
GPS FIX
To enable the fastest possible connection of the ROX 12.1 EVO with GPS/GLONASS, please follow these instructions:
› Locate a field that is as open as possible (no trees, houses or similar that interfere with reception).
› Don’t move around as much as possible for a fast connection.
• You can also use the dropdown menu to determine if a GPS fix has occurred. If yes, all bars of the GPS symbol are there
› Synchronize the ROX 12.1 EVO as regularly as possible with the SIGMA RIDE app to always have the latest GPS data on the device. -
Training
TRAINING SEQUENCE
Every time you turn on the ROX 12.1 EVO, you start on the Home Screen. Before the workout, you can select the sport profile. To do this, click on the currently active profile and then select the desired profile for the workout.
Press the “play” button on the screen to enter the training screen of the selected sport profile. Pressing the “play” button on the ROX will start a workout. If you want to pause your workout, press the “stop” button of the ROX 12.1 EVO.In the stopped state, you can choose to continue, save or delete the workout.
After successfully saving the training, personal successes and the evaluation of the training are displayed. Pressing the Home/Power button will take you back to the Home screen.
At any time during the training you can start a navigation, change training views or add new sensors. To do this, press the Home/Power button to get to the Home screen during the training. By clicking on the Play button with the training time on the homescreen, you return to the active training.
Change values
To change the training values to be displayed, you have two options.ROX 12.1 EVO: By long pressing on a value, you can change the color and function of this value to any. If you want to change the layout, or add more training pages, you must select the desired sport profile under Settings->Sport Profiles. Under Training Views you can now add more pages (up to 6 pages are possible), change the layout of the pages (up to 10 values can be displayed on one page at the same time) and also customize special pages, like Auto Lap.
All mentioned settings can also be made comfortably with the RIDE app
START NAVIGATION / START TRACK
Start Track
In the track menu of the ROX 12.1 EVO you can see all tracks that have been transferred to the ROX 12.1. By clicking on the track you can see the details of the track, via Select you can start the track. Here you have the option to navigate to the starting point of the track or to the track point that is closest to your current position.Start navigation
After successfully creating a route see “Navigating with the ROX” you have the option to customize it after pressing “Show Route”. You can choose between three routing options: Recommended, Simple and Short. By pressing “Start” the navigation is started.As soon as a navigation or track navigation is active, the training page “Navigation” is automatically added to the active training views.
START WORKOUT
MORE INFORMATION CAN BE FOUND IN THE CHAPTER WORKOUT
Shortcut
During the training you have access to the most important functions via the Shortcut menu
ShortCut Top
Swipe from top to bottom to open the Short Cut menu. Besides setting the display brightness, you can see here which sensors are connected. Furthermore, the following functions are available, depending on whether e.g. a navigation is currently active.– Back to start
– Same track back
– Re-Routing
– Power meter Calibrate*
– Sync. Sensors
– Cancel Workout*
– Cancel Navigation*
– Navigation instructions on/off*
– List turns*
– Mark position
– Altitude Calibration
– Auto Pause On/Off
– Auto Lap On/Off
– Strava Live Segments On/Off
– Smart Notification On/OffShortCut bottom
By swiping from bottom to top you get to a navigation shortcut menu. Here you can select your favorite destinations, last destinations or even your home address as a navigation point and the ROX calculates the route. -
SAVING AND EVALUATING
After pressing “Stop” to end the training, you can decide whether to save, continue or delete the training. After clicking on Save, the personal achievements and then the evaluation of the training will appear. READ MORE UNDER EVALUATION OF THE TRAINING ON THE DEVICE
-
OTHER TRAINING FUNCTIONS
CRASH ALERT
Crash Alert uses the acceleration data in the device to detect falls. You can store emergency contacts in the SIGMA RIDE app, who will then be automatically notified in the event of a fall. If you have not stored any emergency contacts, your emergency information will be displayed on the device after the fall – you can also set this via the app.
The process for the crash alert is as follows:
1. fall is detected
2. device signals fall and offers user 30s time to react
3. if there is no reaction, the SIGMA RIDE app is informed (if connected and set up) and the emergency information is shown on the display
4. emergency contacts (if set up) are informed via SMS and sent the current GPS position.If you do not want to use the crash alert, you can switch it off in the device settings.
Smart Trainer
The ROX 12.1 EVO can be connected to a Smart Indoor Trainer via ANT+ FE-C. Here you have different modes in which you can use the ROX 12.1 EVO together with the Smart Indoor Trainer.
Passive
Select this option if you want to use e.g. the ROX 12.1 EVO as a data logger, because you use e.g. Zwift, Ruby or Bkool in parallel.Target power
You can also control a workout with the ROX 12.1 EVO by entering a target power.
Here, the Smart Trainer automatically regulates the resistance depending on the cadence. You can change the desired target power via + and -.Resistance
Should you select the resistance mode, you can control the ‘braking effect’ of the Smart Trainer. This is adjusted in 10% steps and can be conveniently set via the display.To change the mode, wait until the ROX 12.1 EVO has connected to the Smart Trainer and open the short menu. Here, select the item FE-C mode to choose the desired mode. The mode can be changed at any time.
Zoom FunCtion
By clicking on graphics like the map or the elevation profile, the zoom level of these can be adjusted. This allows you to zoom in closer to the map or to select a larger section. The Auto Zoom function, which automatically zooms the map to the next turn when navigation is active, can be set in the Map management area.
INTERRUPT TRAINING / “PAUSE” FUNCTION
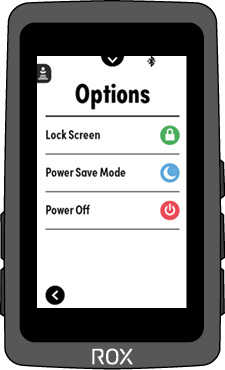
If you want to take a longer break or record the outward and return journey of a commute without creating two activities, press the Stop button at the start of the break. Then press and hold the Home/Power button until the Power menu appears. Here you have the option of setting the ROX to ‘energy saving mode’. All power-intensive functions are reduced here. To wake up the ROX 12.1 again after the pause, simply press the Home/Power button.
Lock display
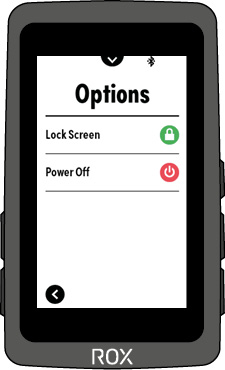
You can activate the display lock function at any time by pressing and holding the power button, whether in an active recording or within the menu level.
NavPage
If you start a navigation or a track, the navigation training page is added automatically. On this page you will see the map, arrival time and the distance to the destination. You can customize the layout and values as you like. More about this under Set sport profiles.
Radar
The ROX 12.1 Evo is compatible with the ANT+ profile Rade. All devices that support this can be paired.
Under Settings->Connection->Connect Sensors->Connected Sensors, various settings for the radar can be made after successful pairing.
During a training, approaching objects are represented by a dot. If the objects are approaching fast, the bar changes from orange to red. If no vehicle is currently approaching, only the radar symbol is visible.
ALTITUDE PROFILE
If you have selected the altitude profile as a training value, the past profile is displayed here, or the future profile in the case of active navigation/track.
By means of colored differentiation you can see how steep or flat the next section is.
By clicking on the field, the zoom level can be adjusted.LAP PAGE /AUTO LAP
After each automatic lap or manual lap, this popup training page shows you the training values of the completed lap. You can easily set the values to be displayed via the RideApp or the ROX 12.1 EVO. More about this under Setting sport profiles
SHIMANO DI2 SHIFTING
The ROX 12.1 EVO can be connected and also controlled* with Shimano Di2 electronic shifting. When their Di2 is connected to the ROX 12.1 EVO, different values can be displayed, which you can display in any training view. The following values can be displayed:
– Di2 Mode
– Di2 battery status
– Gear position for chainring and sprocket
– Gear ratio
– Gears as a graphic with the information of the number of teeth and the gear ratioNOTE: The ROX 12.1 EVO also supports the Shimano D-Fly Channel. These can be used to conveniently operate your ROX 12.1 EVO via the built-in remote control buttons. How to set them you can read in chapter 7.2.1 Shimano Di2 / Sensor connect.
*for this purpose, a radio unit may be necessary. Please ask your dealer for more information
Smartnotifications
By means of Smart Notifications you always stay on the current sand during a workout. The ROX 12.1 EVO can inform you about incoming calls/messages.
To receive Smart Notifications, allow the RideApp to access this data and set the Ok at Smart Notification under Settings/Connections/RIDE App Connect.
Your ROX will then receive this data. You can also turn Smart Notifications on and off at any time during your ride via the Short Menu.DISPLAY PERFORMANCE DATA WITH THE ROX 12.1 EVO
The power meter has become indispensable in the field of training control. Therefore, the ROX 12.1 EVO offers a wealth of data that help to perform a targeted and optimal training. The individual that are available, you can see the function table.
Here you can see an example of how a training page with power and other training values configured. In addition to the settings of the values, the individual fields can also be color-coded. So you can design your training page according to your needs.
-
-
Operation of the device ROX 12.1 EVO
-
MENU STRUCTURE / MAIN MENU
The ROX 12.1 EVO has a touch display.
Here they can perform almost all actions and make all settings.Some functions are only accessible via buttons, these are the on / off, start and stop a workout, manual lap and reaching the start screen (home screen) via the “Home” button.
An overview of all keys can be found in the following diagram:
MAIN MENU
The active sport profile is displayed in the upper left corner. If you tap on the sport profile icon, the selection of created sport profiles opens. Here you can easily and quickly switch to another sport profile.
By tapping on the upper right circle with the ‘Play’ icon, you can switch to the training menu. Once you are in the training menu, the paired sensors will be searched and connected. Note that the desired sensors may need to be activated before they can be found.
Navigation
Here you can create a single-point or multi-point route. You can also draw a route with your finger using the ‘Draw my Route’ function. Which possibilities are available in detail, you can read in the chapter ‘Navigation’.
Track
In the Track section, you will find all tracks that you have synchronized to the ROX 12.1 EVO via the SIGMA RIDE app.
Workout
The ROX 12.1 EVO already has 8 predefined workouts installed for you. If you want to load more workouts on the ROX 12.1 EVO, import the corresponding .fit file into the SIGMA RIDE app and mark the favorite star. This will automatically sync the workout when actively connected to the ROX 12.1 EVO. For more information about the workout, see chapter workout.
SETTINGS
Here you will find all device settings as well as the possibility to connect sensors or the smartphone with the ROX 12.1 EVO. Furthermore, you will also find the map management to download additional maps or delete unused maps. More information about the maps can be found in chapter settings.
Segments
If you have synced Strava Live segments via the SIGMA RIDE app, you can find and view your favorite segments here. You can also see the leaderboard for each segment here.
NOTE: There are NO Strava Live segments transmitted that go downhill.
ACTIVITIES
You can view the most important data of the saved activities on the ROX 12.1 EVO. The activities are sorted by date with the last saved activity displayed first.
TOTAL
Here you can see with which sport profile you have collected which total values (e.g. kilometers).
BEST PERFORMANCES
The ROX 12.1 EVO collects and stores the best performances for you. This includes, for example, the fastest ride, the ride with the longest distance or the one with the longest training time. You can view all these values here.
-
Short Cut
During the training you have access to the most important functions via the Shorcut menu
ShortCut Top
Swipe from top to bottom to open the Short Cut menu. Besides setting the display brightness, you can see here which sensors are connected. Furthermore, the following functions are available, depending on whether e.g. a navigation is currently active.– Back to start
– Same track back
– Re-Routing
– Power meter Calibrate*
– Sync. Sensors
– Cancel Workout*
– Cancel Navigation*
– Navigation instructions on/off*
– List turns*
– Mark position
– Altitude Calibration
– Auto Pause On/Off
– Auto Lap On/Off
– Strava Live Segments On/Off
– Smart Notification On/OffShortCut bottom
By swiping from bottom to top you get to a navigation shortcut menu. Here you can select your favorite destinations, last destinations or even your home address as a navigation point and the ROX calculates the route. -
CHARGING AND BATTERY LIFE
To get to optimum charging time, a charger with min. 1500mA should be used. Please make sure, that you don‘t use a charger that exceed the max. of 3000mA, as it could damage the device.
IMPORTANT: Please ensure that the USB cover is always closed before starting a training session.Battery life time
Modis Battery Save OFF Mid High Paird ANT Sensors 0 0 2 4 Phone Connected No No Yes Yes Backlight Brightness Off Off Auto Full Notification per Hour 0 0 2 8 Training View Timer Timer Timer Map Ongoing Navigation / Track No No No Yes Turning Sounds No No No Yes Operating Temperature 10°C-40°C 10°C-40°C 10°C-40°C 10°C-40°C Estimated Battery Life (h) 22 17 14 10
Depending on use, the ROX 12.1 Evo reaches a battery life of up to 22h
-
SPORT PROFILES
The ROX 12.1 EVO has so-called sport profiles. These serve to link different settings already with the selected sport. If you change the sport profile, for example, the training views and the settings for the automatic break are automatically set. Once set, there is no need to check the settings. The display views and other basic settings can be changed using the SIGMA RIDE app, or on the ROX 12.1 EVO. Even during active training, the training views can be edited with the SIGMA RIDE app, or on the device by long pressure on the data field. Changes, e.g. to the training views are then immediately visible during the ride.
-
COMMUNICATION WITH EXTERNAL SENSORS
The ROX 12.1 EVO can connect to external sensors via two different wireless protocols: Bluetooth Low Energy (BLE) and ANT+. Please note that many sensors offer both protocols. In that case, you only need to connect ONE of the two channels to receive the sensor’s data. We recommend here to choose the connection via ANT+.
The following sensors can be connected:
BLE/ANT+:
› Speed sensor
› Cadence sensor
› Combo sensors for speed and cadence
› Powermeter
› Heart rate sensors (e.g. chest strap)
› Radar
› Gearshift
› Shimano (Di2)
› Rotor power
› Remote controlsANT+: › Smart trainers that support the FE-C protocol
To find out if your sensors support the above protocols, please refer to the sensor manufacturer’s user manual. How to establish the connection can be found in the chapter SETTING THE CONNECTION TO SENSORS.
-
-
Settings ROX 12.1 EVO
-
MAKE SETTINGS ON THE SMARTPHONE
You can also make all settings conveniently with your smartphone and the SIGMA RIDE app. Connect your smartphone on which the SIGMA RIDE app is installed with the ROX 12.1 EVO.
From the device settings, add/delete sport profiles or even set the training views of the individual sport profiles, you can comfortably configure your ROX 12.1 EVO according to your wishes via the RIDE app.
-
MAKE SETTINGS ON THE DEVICE
This chapter describes the settings you can adjust in the main menu.
To make the settings, press “Settings” on the home screen of the ROX 12.1 EVO.
Device: Here you will find all device settings
Map: Here you will find all map settings
Sport profiles: This is where you set the sport profiles that are on the device
Connection: Here you can set up connections to external sensors, a smartphone,eBIKE or Wifi.
User: Here you set all personal data -
DEVICE SETTINGS
Language: Here you can select the language
Unit of measurement: Here you can set in which measurement system the data will be recorded Metric/Imperial/Manual. Manual allows you to set the unit for speed, distance, altitude, temperature, weight and GPS format.
Display settings: Here you can set the illumination time and color mode.
Automatic Off: Here you can set whether the ROX 12.1 EVO turns itself off after a certain period of inactivity.
Tones/Alarm: Here you can turn the tones for different functions on and off.
Assistmode Popup: Here you can set whether popups light up by changing the Assistmode (eBIKE).
Altitude calibration: Here you can set whether the altitude calibration is automatic (recommended) or manual. With manual you set the current altitude.
Time Format: Set the time format 12h/24H.
Date format: Here you can set the date format dd.mm.yy or mm/dd/yy.
Crash Alert: Here you set whether an emergency message should be sent to your emergency contacts via the SIGMA RIDE app in the event of a fall with no reaction. -
Map Management
Under Settings->Map you can make various settings regarding the maps.
Under Map Management it is possible to download new maps, update existing maps or delete regions that are no longer used.
You can also set the map orientation. You have the choice between “in driving direction” and “to the north”.
Furthermore, you can set whether segments, POI and bike paths appear on the map. The function of Auto Zoom, which automatically zooms the map to the next turn when navigation is active, can also be activated or deactivated. -
SPORT PROFILES
Six predefined sport profiles are preinstalled on your ROX 12.1 EVO. If you want to change them or add new ones, go to Settings->Sport Profiles. By clicking on the profile, you can adjust its settings. Additional profiles can be added to the ROX 12.1 EVO via the “gear icon”.
TRAINING VIEWS
For each sport profile you have the possibility to activate up to 6 training pages with up to 10 training values each. In the view, besides the number of data fields, you can also customize the layout of the page by clicking on the arrows
By clicking on a data field you can customize the function and color of the data field.
Auto Pause
If the Auto Pause is activated, the ROX 12.1 EVO automatically goes into pause during a workout as soon as a speed below 2.2km / h is detected. When a higher speed is detected again, the training is automatically continued. Tip: Press Stop for longer pauses!
wheel circumference
The setting of the wheel circumference is mainly relevant for the use of an external speed sensor. How to connect this is described in the chapter CONNECTING EXTERNAL SENSORS. To determine the correct wheel circumference, you can either use the following table as a guide, or measure the wheel circumference. To do this, mark the starting point on the wheel and on the ground. Roll the wheel exactly one revolution and mark the end point on the floor. Then measure the distance between the start and end points. This distance gives the correct wheel circumference (in mm). To set the wheel circumference in the ROX 12.1 EVO, you can choose from one of the following values, alternatively you can also set a manual value.
To do this, select the “Manual wheel circumference” item and enter your circumference via the numeric keypad. Press the “check mark” to save the value.
ROUTING OPTIONS
Here you can set according to which preferences a route should be created under this sport profile. You can set the sliders for main roads, dirt roads and bike paths between Low, Medium and High. You can also set whether one-way streets and ferries should be taken into account.
ALERT
Food, drink and individual alert can be set. Depending on your preferences, these reminders can be set time or distance based and also repeat.
TARGET ZONE
You can set a target zone for your workout to better control the workout. If you want to follow a specific sequence of target zones, e.g. according to a structured training plan, we recommend using the workout function.
You can define the following values as target zones:
› heart rate
› speed
› cadence
› PowerDefine the upper and lower limits for the target zone as well. If you have set a target zone, remember to also display the target zone as one of the training values in the display. For more information, see the SETTING TRAINING VIEWS chapter here.
INTENSITY ZONES
Different training zones are defined by specifying the Maximum Heart Rate. You can adjust the limits of these zones. To view the zones during a workout, remember to show intensity zones as one of the workout values in the display.
POWER ZONES
Different training zones are defined by specifying the FTP power. You can adjust the limits of these zones. To view the zones during a workout, remember to show power zones as one of the workout values in the display.
AUTO LAP
The ROX 12.1 EVO can record automatic laps. You can select either distance or time for recording automatic laps. For example, if you have selected Distance ‘ 5 km, the ROX 12.1 EVO will take an automatic lap every 5 km.
If you set the setting to OFF, no automatic laps are recorded.
GNSS (GPS+Galileo+GLONASS)
The ROX 12.1 EVO has a modern GNSS module that supports all major satellite systems. These include GPS (USA), Galileo (Europe) and GLONASS (Russia). The ROX 12.1 EVO itself controls which systems are currently addressed. In addition to the accuracy of the position, of course, the energy consumption also plays an important role. Both are automatically adapted to the conditions, so you do not have to do anything.
NOTE: In the sport profile ‘Indoor’ GNSS is switched off, because it would have no use in the indoor area.
-
User
The following table describes which user data you can set on the ROX 12.1 EVO and what influence these settings have on the use of the device and its data. To set the user information, select Settings › User.
-
FACTORY SETTINGS
If you want to completely reset your ROX 12.1 EVO, you can do so here.
ATTENTION: All data will be irrevocably deleted! The installed maps, remain thereby!NOTE: If your ROX 12.1 EVO is connected to the RIDE app, you must pair your ROX 12.1 EVO again. Once your ROX 12.1 EVO is reconnected to the RIDE app, all sport profiles, settings, favorite tracks and workouts will automatically be played back on your ROX.
Activities will NOT be transferred back to the ROX 12.1 EVO.
-
-
Set connections
-
SIGMA RIDE App
To establish the connection to the smartphone, make sure that Bluetooth is switched on on your smartphone. You must download the SIGMA RIDE app from the respective app store (iOS or Android). If these two requirements are met, select the menu item Connect RIDE App in the ROX 12.1 EVO under Settings<Connections. The ROX 12.1 EVO will automatically search for the SIGMA RIDE app. For the further process, please follow the instructions in the SIGMA RIDE App.
The SIGMA RIDE app will ask you for various permissions, including location sharing. Agree to these authorization requests to ensure optimal functioning of the SIGMA RIDE app. If you have successfully connected the smartphone, you can see which smartphone has been connected to the device in the Connect RIDE app menu item, as well as unpair the smartphone. Please note that the ROX 12.1 EVO can only communicate with ONE smartphone.
-
CONNECTION TO SENSORS
The easiest way to search for sensors is to use the “Search all” function. Here you only have to make sure that the sensor is active. As soon as this is the case, it will be listed in the sensor search list. You have the possibility to pair all sensors at once or to pair single sensors. You can see which sensors have already been connected in the “Connected sensors” area.
Some sensors provide additional information that can also be retrieved. For example, the electronic circuit provides important information about the battery condition.
The following ANT+ / ANT sensors are supported:
– Speed sensor
– Cadence sensor
– Speed & cadence combo transmitter
– heart rate
– Power meters (PWR and CTF) – without “Cycling Dynamics”.
– Gear changes – Di2, eTap, Campa EPS
– radar
– FE-C / Smart Trainer
– remote control
– Rotor power meter – incl. display of OCA/OCP valuesBLE SENSORS
If you own a sensor that transmits data exclusively via Bluetooth Low Energy, you can also connect it to the ROX 12.1 EVO. The following BLE sensors are supported:
– Speed/Cadence
– heart rate
– Power meter
To start the search for BLE sensors, select ‘Settings/Sensor Connect/Search All -> BLE Search’.
Now only BLE sensors will be searched for. If you want to switch back to ANT+ sensor search, press ANT+ Search.NOTE: If your sensor supports ANT+ and BLE we recommend to use the connection via ANT+!
Powermeter (ANT+)
Should you use a power meter, you have the possibility to perform a zero calibration here. Since each power meter has differences in handling, read the manual of the power meter or contact the appropriate service, if the calibration does not run as desired.
ROTOR Powermeter
If Rotor is used, it must be connected as a rotor powermeter, otherwise it will not be possible to display the OCA/OCP values.
Shifting
You have the possibility to couple your electronic shifting. To get the correct gear ratio displayed during training, you must enter the number of teeth of the chainring as well as sprocket.
Shimano Di2 – D – Fly Channels:
The ROX 12.1 EVO supports Shimano D-Fly Channels, by means of which you can control the ROX 12.1. In doing so, you have the following options that you can set in the ROX 12.1:
– Next page (scroll)
– Previous page (scroll)
– Start/Lap
– StopYou also have the option to put the functions on the same button with different operation:
– Single press
– Double press
– Press and holdRadar
The ROX 12.1 EVO can be connected to a radar sensor. To do this, turn on the radar to be able to pair it with the ROX 12.1 EVO. If a radar is paired, you have the following setting options:
– Display of the radar bar
– Setting the tones
As soon as the radar sensor is paired, the radar icon is displayed on the selected page. This element and the corresponding bar is always visible and in every menu and disappears only when the radar sensor is no longer active or the connection is actively disconnected.FE-C / Smart Indoor Trainer
If you have a Smart Indoor Trainer that supports the ANT+ FE-C profile, you can connect it to the ROX 12.1. Once the Smart Trainer is connected, you can control it using the ROX 12.1 EVO.
It is recommended to calibrate the Smart Trainer from time to time (please refer to the user manual / instructions of the Smart Trainer manufacturer). You can easily perform the calibration using ROX 12.1 EVO. Simply connect the Smart Trainer to your ROX 12.1 EVO in the menu ‘Settings/Connections/Connect Sensor/Connected Sensors/Indoor Trainer -> Calibration and follow the instructions on the ROX 12.1 EVO.ANT+ REMOTE CONTROL
The ROX 12.1 EVO can also be connected and controlled with an ANT+ remote. Depending on the remote, you have the option to assign your own functions to buttons. To do this, connect your ROX 12.1 EVO to the corresponding ANT+ remote.
NOTE: To pair the remote, it may be necessary to set the remote to pairing mode (refer to the remote manufacturer’s user manual).
-
E-Bike
To connect an e-bike to the ROX 12.1 EVO, select the menu item E-bike>Search e-bike in the connection settings. To find out if your e-bike is compatible with the ROX 12.1, please refer to the following list: COMPATIBILITY LIST
The e-bike must be in the vicinity (maximum distance approx. 50 m) and switched on for pairing. If further steps are necessary on the e-bike side to connect the e-bike with a display, please refer to the user manual of your e-bike.
If compatible e-bikes are found, a list of the e-bikes found is displayed after the search. Select the desired e-bike (set check mark) and start the pairing with the (ok check mark). If the pairing is successful, the overview of all paired e-bikes is displayed. To see more information about your e-bike, click on the e-bike and pair it. Afterwards you can see the further information under E-Bike Details. You can also disconnect the ROX 12.1 EVO from the e-bike by clicking on the (trash can icon).
-
Wifi
Connect the ROX 12.1 EVO to your WiFi to check if a new firmware update is available for your ROX 12.1 EVO or to download maps for your next bike trip.
To connect to your home WiFi, go to the Settings>Connections>WiFi menu. Activate WiFi by tapping on WiFi (red area). Now all available WiFi networks will be displayed. Select theirs and enter the password.
Now a connection to your WiFi will be established.
-
-
Navigating with the ROX 12.1 EVO
The navigation is the heart of the ROX 12.1 EVO and offers many options of a route creation.
You have the option to simply specify a destination or also add intermediate destinations.Note: If intermediate destinations have been added, they must be passed. If you want to skip a waypoint, this is possible during the journey via the short menu.
-
SIMPLE NAVIGATION OR ONE-POINT NAVIGATION
If you want to drive to a known or specific destination, you have the following options to choose from:
– Address Simple entry of a specific address.
– POI (Point of Interest) Selection of a destination via a category, e.g. gas station or cafe. In case of one-point navigation, select “Current position” as an option.
– Point on map This opens the map, on which you can set one or more points
– Last destinations Here you will find a list of the points that were used last.
– Favorites If you have already set favorites (can be done via the short menu), you can find them here
– Coordinates Sometimes the destination input requires the input of coordinates (e.g. mountain huts). This is possible here.After selecting one of the above points, the list view will automatically appear showing the selected point. For one-point navigation, you can now simply go to “Show route”. It will always route from the current position, just like usual navigation systems.
You will get the following three options:
– Recommended Optimal route calculated according to the sport profile.
– Easy The route with the least elevation gain
– Short The shortest route. Please note: The shortest route may have significantly more altitude meters than the other two suggestions.In the route options overview, you also have the following options or information:
If you tap on the map, it will be enlarged and you will have the possibility to view the route in detail
Using the options, they can save the created route directly as a track or as a favorite.
-
MULTIPOINT Navigation
With the ROX 12.1 EVO you have the option to create a route with several points. To do this, you first proceed in the same way as for single-point navigation. Once you are in the list of points, simply press “Add point.” to add a waypoint or via point. The following type of destinations can be added:
– Address
– POI (Point of Interesst)
o POI search around the current position
o POI around an individual position (e.g. an address or point on the map)
o POI around an already set waypoint
– Point on map
– Point based on coordinates
– A favorite point
– One of the Last DestinationsA route can consist of up to 50 points. The order can be easily changed by holding down an entry and then moving it in the desired direction. While the point is held down, it is highlighted in gray.
The following options are available in the context menu:
– Delete all Deletes all entries
– Delete selection Select items you want to remove again
– Reverse sequence You can reverse the entire sequence. This means that they do not travel from A ► B but B ► A.
– Routing options If you want other routing options for this selection of points than those that are stored in the sport profile, you have the option to do so hereOnce you have finished compiling the points, select “Show route” to calculate the route. Here you also get an overview of the created route with the information about distance and altitude meters as well as the altitude profile, which can be reached by swiping. again, the current position is seen as the starting point and from there a route is created.
-
Routenplanung am ROX 12.1 EVO
The ROX 12.1 EVO also offers the possibility to plan a route independently of the current position. This can also be in another country, for example, to plan his first tour for the next bike trip.
To do this, proceed in the same way as described under point 1.2 Multi-point navigation. You need at least 2 points, because the current position should not be taken into account.When you have created a route, select the cogwheel to open the options.
Remove the checkmark from ‘Start: Current position’ to set the starting point to the first point in the list.
NOTE: Since the route may be very far from the actual position, this tour cannot be started, but must be saved as a track. If you are then on site, you can select this under Tracks and drive off.
-
Draw my Route
With “Draw my Route” the ROX 12.1 EVO offers a unique route planning tool.
This is less about planning the route exactly. Rather, you can use it to discover new routes. The special feature here is that you draw the route yourself on the display. Select the pen, draw on it and let yourself be surprised which route the ROX 12.1 EVO has in store for you.
-
START A ROUTE
If you want to start a route, press the START field in the lower area.
If the starting point is not directly at the current position, the ROX 12.1 SPORT will automatically navigate you to the starting point. This may result in a longer route than the one originally displayed.
NOTE: To start recording, you MUST also press the ‘Start’ button once initially.
When the START field is selected, the training view is automatically opened. The navigation screen is selected. The lower two values can be configured freely. The map cannot be changed in this screen.
-
FAVORITES
During the journey, a position can be saved at any time via the short menu, which is then saved as a favorite. POIs can also be stored as favorites. This way you always have them quickly available when you want to drive to them again.
-
-
Track Navigation
-
Track Import
You have different options to transfer a planned track to your ROX 12.1 EVO. In the RIDE app, you can directly import a track in .gpx, .fit or .kml format. You can also view your planned tracks from the SIGMA Data Center, Strava and Komoot in the RIDE app. To view these tracks, log in with your account at More->Cloud & Apps.
Note: Only with komoot premium, the planned komoot tours are synchronised with the SIGMA RIDE App.
To transfer a track from the RideApp to your ROX 12.1 EVO, press the star in the track view. If the track is a favorite, it is automatically transferred to the ROX 12.1 EVO and can then be selected and started in the track menu of the ROX 12.1.
-
Search and Go – Ride App
The Search & Go function is a one-point navigation. With the help of this you have the possibility to be navigated quickly and easily to any destination. When the route is planned, the corresponding turn-by-turn directions are displayed on your ROX. The procedure is as follows:
- SIGMA Ride App and ROX connect
- Navigation -> Select Search & Go
- Enter destination address or select point on map
- Get route
- Via the bicycle icon the routing options can be set
- Start route, or save as track
-
-
Workouts with ROX 12.1 EVO
The ROX 12.1 EVO already has 8 predefined workouts preinstalled. These offer an introduction to the possibilities of training control with the ROX 12.1 EVO. Among these predefined workouts is, for example, an 8-minute FTP (functional threshold). With the help of the workout, you can determine the functional threshold, which you can use for the upcoming training sessions.
-
START WORKOUT
To start a workout, do the following:
– On the Home screen, select the Workout item
– For example, choose the workout FTP – Test – 8min
– Confirm the selection
– Press the Start button as soon as you want to start the workout.Once you have completed the workout, the workout page disappears. If you want to end the workout prematurely, proceed as follows:
› Open the Short Cut menu by swiping from top to bottom.
› Select Cancel WorkoutNOTE: A workout can also be started during an ongoing training.
-
MANAGE WORKOUT
If you have created a workout via a compatible service, you can easily transfer it to the ROX 12.1 EVO via the SIGMA RIDE app. Simply import the .fit workout file into the RIDE app and star the desired workout. All favorited workouts are synchronized with the ROX 12.1 EVO and can be started on the ROX 12.1 EVO at any time.
-
-
Evaluation of the training data on the device ROX 12.1 EVO
You have several options to evaluate your training data on the ROX 12.1 EVO
-
SUMMARY AFTER THE TRAINING
After each training session, you will receive a summary of the most important training values. This summary is dynamic and offers you different evaluation options depending on the sensors used and the available data
Total values: Here you can see the total values of your training, e.g.: Training Time, Max. Speed, Altitude Uphill, Calories, SPI, … .
Map: Here you can see the course of your training, if GPS is activated.
Rounds: Here you can see the data of the manually created rounds.
Graphic: Here you can see the data, such as altitude, speed, cadence, …, graphically processed.
-
-
Strava Live Segments ROX 12.1 EVO
How can I use Strava Live Segment on my ROX 12.1 EVO?
Note: A maximum of 100 segments can be transferred.-
TRANSFERRING MY 'FAVORITE' SEGMENTS TO THE ROX 12.1 EVO
To transfer the Strava segments to the ROX 12.1 EVO, you need to install the SIGMA RIDE app on your smartphone.
Pair the ROX 12.1 EVO with the RIDE app (if not already done). Proceed as follows:
– ROX 12.1 EVO: Settings>Connections>SIGMA RIDE
– Scan the QR code displayed on the ROX 12.1 EVO with the SIGMA RIDE app.
– ROX 12.1 EVO and the SIGMA RIDE app is now connected
– Now go to ‘More>Cloud&Apps’ to log in to Strava.In the main menu, select ‘RIDE’ in the lower section. With an active connection to the ROX 12.1 EVO, the ‘Strava Segments’ button is now displayed. To transfer the Strava segments, press the Strava Segments button (if it is not visible, you have to swipe a bit to display the lower area).
Note: You must be a Premium user to transfer Strava segments.
You can now also view Strava segments on the ROX 12.1 EVO.
-
STRAVA LIVE SEGMENTS DURING TRAINING
Once the workout has been started (press the Start button -> middle button on the right side), the Strava Live Segment page will automatically appear as you approach a segment.
To change the comparison partner, swipe the bottom of the Strava Live Segment page.
When you complete the Strava segment, the result is automatically displayed.
-
-
Evaluation of the training data using software
-
SIGMA RIDE APP
With the SIGMA RIDE app you can carry out an extensive evaluation of your training data. Different training parameters, graphics, etc. are displayed for each training unit. You can also export your training data to third-party portals directly from the SIGMA RIDE app. Please refer to the sharing menu of the app to find out which portals are available for this. To view previous training units, switch to the activity list and select the relevant unit.
-
SIGMA DATA CENTER
In the SIGMA DATA CENTER you have even more in-depth analysis options for your training data. In addition to the functions in the SIGMA RIDE app, you can delve even deeper into the data here as well as export the data in other formats (e.g. .csv). In DATA CENTER you also have more detailed options for planning a track.
Note: A direct connection via USB to the data center is not possible. Data can be imported using the RIDE APP and the SIGMA CLOUD.
-
Third party providers
The training data of the ROX 12.1 EVO is available as a .FIT file. Therefore, all portals that use this standard can read the data of the ROX 12.1 EVO. You can perform the export to corresponding third-party providers via the SIGMA RIDE app.
Furthermore, the ROX 12.1 EVO can also process e.g. workout data from third-party providers such as Trainingpeaks.
-
-
SIGMA Performance Index (SPI)
The SIGMA Performance Index, or SPI for short, offers you an objective assessment of your training performance.
The value is made up of 3 different variables:
› The meters in altitude uphill
› The total distance of the training
› The average speedIf these values increase, the SPI also increases. If you look at your SPI values over time, you can see a clear increase, stagnation or deterioration in performance. The SPI does not consider any individual data such as heart rate or performance. The value is given without a unit and can have values between 1 and 9999, with most values in the range from 1-600.
These examples will give you a feel for the SPI:
The following examples illustrate the meaning and interpretation of the SPI:
› In a cycle race, all athletes drive the same route. The one with the highest SPI wins. The altitude and distance are the same for all athletes, only the highest average speed makes the difference here.
› If you drive the same route with the same average speed but less elevation gain, the SPI will decrease because the elevation gain is taken into account in the calculation.
› If two athletes drive the same distance at the same speed, they have the same SPI value, even if heart rate and performance may be different. -
Update the firmware ROX 12.1 EVO
To check if a new FW is available for your ROX 12.1 EVO, you need to connect the ROX to the Wifi. Under the item Settings->Update Firmware the ROX searches for the latest FW. If a new FW is available, you can download it directly and then install it. Note: Do not turn off your ROX during the download of the update.
-
Technical information ROX 12.1 EVO
-
SPECIFICATIONS
Battery type ROX 12.1 EVO Max. voltag: 5V DC / Max. current: 1.4A |
Rechargeable 2400 mAh /9.12 Wh BatteryMaximum operating altitude 5000 m Operation temperature -10 °C to +45 °C Operation frequency WiFi 2.4 GHz @ 15.1 dBm nominal
ANT+ 2.4 GHz @ 4 dBm nominal
Bluetooth 2.4 GHz @ 4 dBm nominal
GPS 1575.42 MHz (receiver only)
GLONASS 1602 MHz (receiver only)
Galileo 1575.42 MHz (receiver only)Transmission power <20 dBm Water and Dust rating ROX 12.1 EVO: IP67 We recommend to charge the device at room temperature 23°C ± 5°C
-
CLEANING THE DEVICE
We recommend cleaning the ROX 12.1 EVO at regular intervals and in case of heavier soiling. Please use only mild cleaning agents for this purpose. To ensure optimal function of e.g. the altitude sensor, regular cleaning of the device is necessary. To clean the altitude sensor, it is best to place the ROX 12.1 in clear water for a few minutes and then rinse the device again under running water. If the device is very dirty, dirt may block the buttons. In this case, please follow the same instructions as for cleaning the altitude sensor.
-
EU DECLARATION OF CONFORMITY
We, SIGMA-ELEKTRO GmbH, Dr.-Julius-Leber-Str. 15, D-67433 Neustadt / Weinstraße declare that the ROX 12.1 EVO bike computer and the SPEED, CADENCE and R2 Duo transmitters, when used as intended, meet the basic requirements of RED Directive 2014/53 / EU and RoHS Directive 2011/65 / EU.
The CE declaration can be found at: CE.SIGMASPORT.COM/ROX121
-
GUARANTEE CONDITIONS
We are liable to our respective contractual partner for defects according to the statutory regulations. Batteries are excluded from the warranty. In the event of a warranty, please contact the dealer from whom you bought your bike computer. You can also send the bike computer with your proof of purchase and all accessories to the address below. Please ensure that there is sufficient franking.
Please note that our ROX devices have only been tested in the laboratory and in the field in conjunction with original SIGMA mounting systems. Accordingly, we can only grant guarantee or warranty claims for damage resulting from the connection of the bike computer to a mounting system for devices connected to original SIGMA mounting systems.
SIGMA-ELEKTRO GmbH
Dr.-Julius-Leber-Straße 15
67433 Neustadt/Weinstraße
Germany
Email: kundenservice@sigma.bikeIf you have justified warranty claims, you will receive a replacement device. There is only an entitlement to the current model at the time. The manufacturer reserves the right to make technical changes.
-
DISPOSAL
Batteries must not be disposed of with household waste (Battery law)!
Please bring the batteries to a designated handover point or to a retailer for disposal.
Electronic devices must not be disposed of with household waste. Please hand the device over to a designated disposal point or to a retailer.
Before disposal, all personal data must be deleted from the device.
-
-
Download manual
-
Evaluation of the training data using software
-
SIGMA RIDE app
With the SIGMA RIDE app you can carry out an extensive evaluation of your training data. Different training parameters, graphics, etc. are displayed for each training unit. You can also export your training data to third-party portals directly from the SIGMA RIDE app. Please refer to the sharing menu of the app to find out which portals are available for this. To view previous training units, switch to the activity list and select the relevant unit.
-
SIGMA DATA CENTER
In the SIGMA DATA CENTER you have even more in-depth analysis options for your training data. In addition to the functions in the SIGMA RIDE app, you can delve even deeper into the data here as well as export the data in other formats (e.g. .csv). In DATA CENTER you also have more detailed options for planning a track.
-
Third party providers
The training data of the ROX 11.1 EVO is available as a .FIT file. Therefore all portals that use this standard can read the data of the ROX 11.1 EVO. You can export to relevant third-party providers using the SIGMA RIDE app. If the portal you want is not available for automatic synchronization, you also have the option of uploading the .FIT files directly to the third-party provider. To do this, you have to connect the ROX 11.1 EVO to the PC using a USB-C cable. The training data can then be found in the Activities folder.
Furthermore, the ROX 11.1 EVO can also process e.g. workout data from third-party providers such as training peaks.
-
-
-
FAQ
-
How can I connect to the SIGMA RIDE APP via smartphone?
Simply connect your smartphone using the QR code displayed.
If you do not receive a QR code, please press Select device manually when connecting. -
ROX 12.1 - How many sensors can I connect?
You can connect up to 20 sensors to the ROX 12.1.
-
Why do I get an increased speed display?
Multiple assignments may occur when pairing the sensors. Make sure that the sensors are only paired via ANT+ or BLE.
-
Why can't I see any calories?
To do this, a heart rate sensor (ANT+ or BLE) must be connected to the ROX.
Also make sure that the training view has been customised via the SIGMA RIDE APP. -
How do I delete my sports profiles?
Open the SIGMA RIDE APP and select the device you are using.
In the Sport profiles tab, you can delete the corresponding sport profile by swiping from right to left. -
Why does my SIGMA ROX computer not recognise sensors?
This happens when the battery in your sensors is exhausted. When replacing batteries, please ensure that you use the correct battery type (CR2032) and install them the right way round. If you are using a new sensor, check that the insulating strip on the battery has been removed.
-
Can the ROX measure the temperature?
The ROX measures the temperature during training, but may occasionally display temperatures that deviate from the actual temperature of your environment. This can occur, for example, if the device is exposed to direct sunlight, is being charged via an external battery or is exposed to sudden temperature fluctuations.
-
Why are values from my e-bike missing?
The ROX is merely a display device. If values are displayed incorrectly, please update your e-bike system.
-
How do I perform a tour data reset?
Press and hold the right button until the tour has been saved.
-
Description of the HF zones
For better training control, HR zones derived from the individual maximum heart rate are displayed for various training areas.
Range Per cent of maximum heart rate Meaning 1 (Recover) <60% Relaxed, easy ride. Low load 2 (Cardio) 61%-70% Comfortable ride 3 (Fitness) 71%-80% A slightly more strenuous ride, good training for the cardiovascular system. 4 (Performance) 81%-90% Fast ride that is more demanding. 5 (Speed) 91%-100% Maximum performance that can only be maintained for a short time. -
How do I recognise whether the sensors are connected via ANT+ or BLE?
In the menu under Connections->Sensor->Sensor list, you can display the connected sensors. Depending on the connection, either ANT+ or BLE is displayed at the top left
-
How can I set the time zone as well as the time?
Time zones / time of day – Every time you switch on the device and acquire satellite signals or synchronise the device with your smartphone, it automatically determines the time zone and the current time.
-
Can I also use mounts from third-party suppliers?
Only use the bracket from SIGMA SPORT.
-
How do I add my translation to my connected electronic circuit?
If your electronic gear system is transmitting incorrect values for the gear ratio, you can change this by selecting your gear system in the menu under Connections->Sensors->Connected sensors. You can then use Set to change the number of teeth on the front chainrings and the cassette.
-
How does the Crash Alert work?
The ROX can use acceleration sensors to recognise whether you have been involved in an accident. If a crash is detected, a message appears on your ROX asking whether everything is OK. If this question is not answered, the ROX displays the medication you have stored. In addition, if a connection to the RIDE app is active, an automatic text message with the latest position data is sent to the emergency contacts you have stored.
-
CARE OF A HEART RATE SENSOR WITH A COMFORTTEX BELT
TRANSMITTER UNIT
o Remove the transmitter unit from the belt after each use and dry it with a soft towel.
o Make sure that you detach both sides of the transmitter unit from the belt so that the buckles do not oxidise and the battery does not wear out.
o If necessary, clean the transmitter unit with mild soap and water. Never use alcohol or abrasive materials (steel wool or chemical cleaning agents). Never put the transmitter unit in the washing machine or tumble dryer. ”
TEXTILE BELT
o Wash the belt under running water after each use and hang it up to dry.
o Wash the belt regularly in lukewarm water with mild hand soap or washing-up liquid. Rinse the belt thoroughly after washing and hang it up to dry. Do not use moisturising soaps as they can leave residues on the belt. Do not soak, iron, dry clean or bleach the belt. Do not stretch the belt and do not bend the electrode areas.
o IMPORTANT INFO
o Dirt impairs the elasticity and function of the belt. Wash the belt regularly to ensure it works properly and to maximise its service life.
Remember that the belt does not last forever. It wears out like any other item of clothing that you wear and wash regularly. Straps are available as accessories when yours wears out. ”
STORAGE
o Dry and store the strap and the heart rate sensor transmitter unit separately to maximise the life of the heart rate sensor battery.
o Always store the heart rate sensor in a cool and dry place.
o To avoid corrosion of the buckles, do not store the heart rate sensor damp in a non-breathable material, such as a sports bag.
o Do not expose the heart rate sensor to strong sunlight for long periods of time. -
How many Strava Live segments can I transfer?
A maximum of 100 segments can be transferred.
-
What warranty claims do I have?
As a manufacturer, we would like to point out that the legal warranty for this product. The warranty period is two years from the date of delivery of the goods to the end customer. Within this period, we are liable for material defects that already existed at the time of handover.
Batteries and rechargeable batteries:
Batteries and rechargeable batteries are subject to the statutory warranty. However, please note that batteries are consumables with a limited lifespan. This does not include a natural loss of capacity due to use.
-
-
Change Log
-
ROX 12.1 EVO (V1.72)
NOTE:
If you have version 1.70 installed and cannot install the new version, proceed as follows:- Check the current battery level.
- If it is >60%, use the ROX until the battery level is <50%, then charge the ROX until the battery level is >75% and then perform the update.
- If the battery is <60%, charge the ROX until the battery level reaches approx. 85% and then perform the update.
- The update should now be performed as usual. The problem that occurred here has been fixed with the new version 1.72.
Features:
- Remote One Integration
- House number entry is now possible
- Smart notifications can be dismissed using the buttons
Bug Fixing:
- SHIMANO E-Bike: Connection issues
- SHIMANO D-Fly channel assignment corrected
- E-Bike distance jumps
- Incorrect display of the EMB sport profile
-
ROX 12.1 EVO (V1.70)
Features:
- Remote One Integration
- House number entry is now possible
- Smart notifications can be dismissed using the buttons
Bug Fixing:
- SHIMANO E-Bike: Connection issues
- SHIMANO D-Fly channel assignment corrected
- E-Bike distance jumps
- Incorrect display of the EMB sport profile
-
ROX 12.1 EVO (V1.60)
- E-Bike // Giant – Assist Mode + Range Graphic shows Auto all the time
- Drinking / eating alarm / Sensor Low Battery / Smart Notification has no sounds
- No Connection possible with Mahle X20 (LEV) System.
- Improved Sensor Connectivity for ANT+ Remote and SHIMANO Di2
- Overall improved System stability
-
ROX 12.1 EVO (V1.50)
- Improvement sweat detection of the touch FW
- Fixed a bug that could lead to a crash in combination with Track
- The name for incoming calls is now displayed correctly (iOS)
- Date error has been fixed
- Recording a Training can’t be stared
- Improvement of the general system stability
-
ROX 12.1 EVO (V1.40)
- Keep zoom-level of track after reboot
- Improved connectivity to E-Bikes
- Fixed sync error after Factory Reset
- Fixed issue with track sorting by date
- Add low memory message
-
-
Short manual
-
Short Manual ROX 12.1 EVO
-
-
Service Contact
-
Service Contact
-
-
Product and safety information
-
Product and safety information ROX 12.1 EVO
-
Contact
Email
productsafety@sigma.bike
-
Accessories
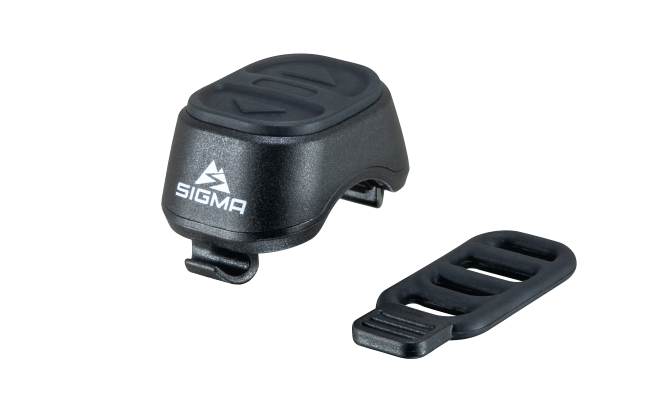
REMOTE ONE – Silicone Strap –
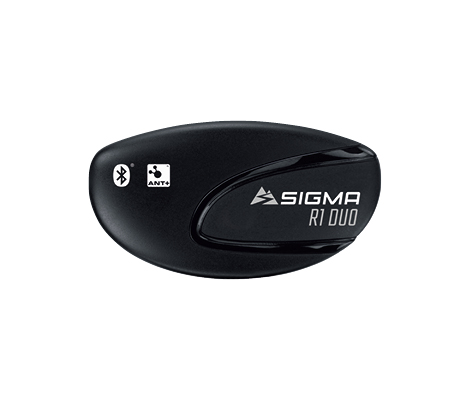
ANT+/BLUETOOTH SMART HEARTRATE TRANSMITTER
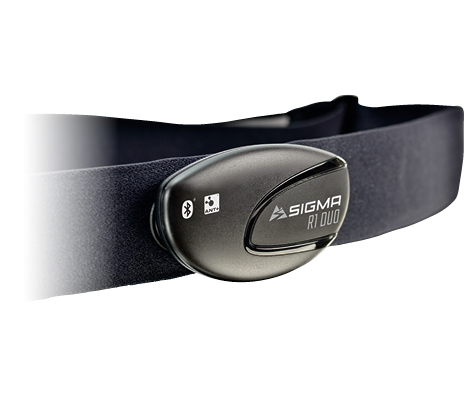
ANT+/Bluetooth SMART HEARTRATE TRANSMITTER R1
COMFORTEX+ Elastic Strap
DUO MAGNETLESS CADENCE
DUO MAGNETLESS SPEED
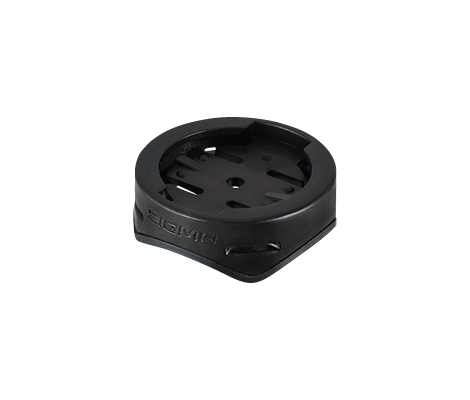
GPS Mount
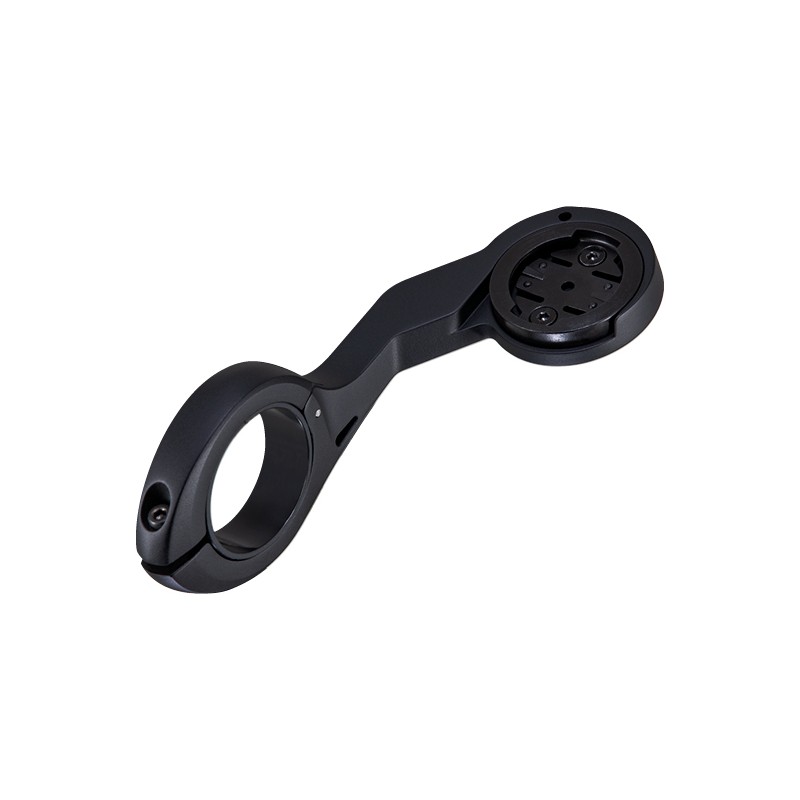
Long Butler GPS
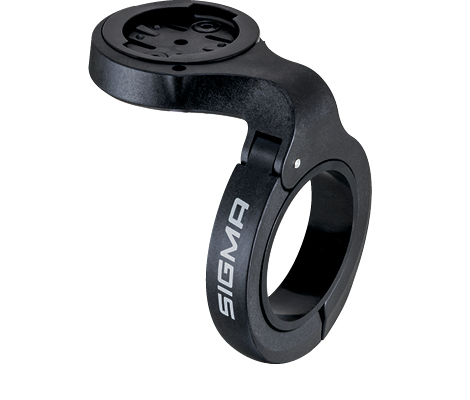
Over Clamp Butler GPS
USB-C Cable
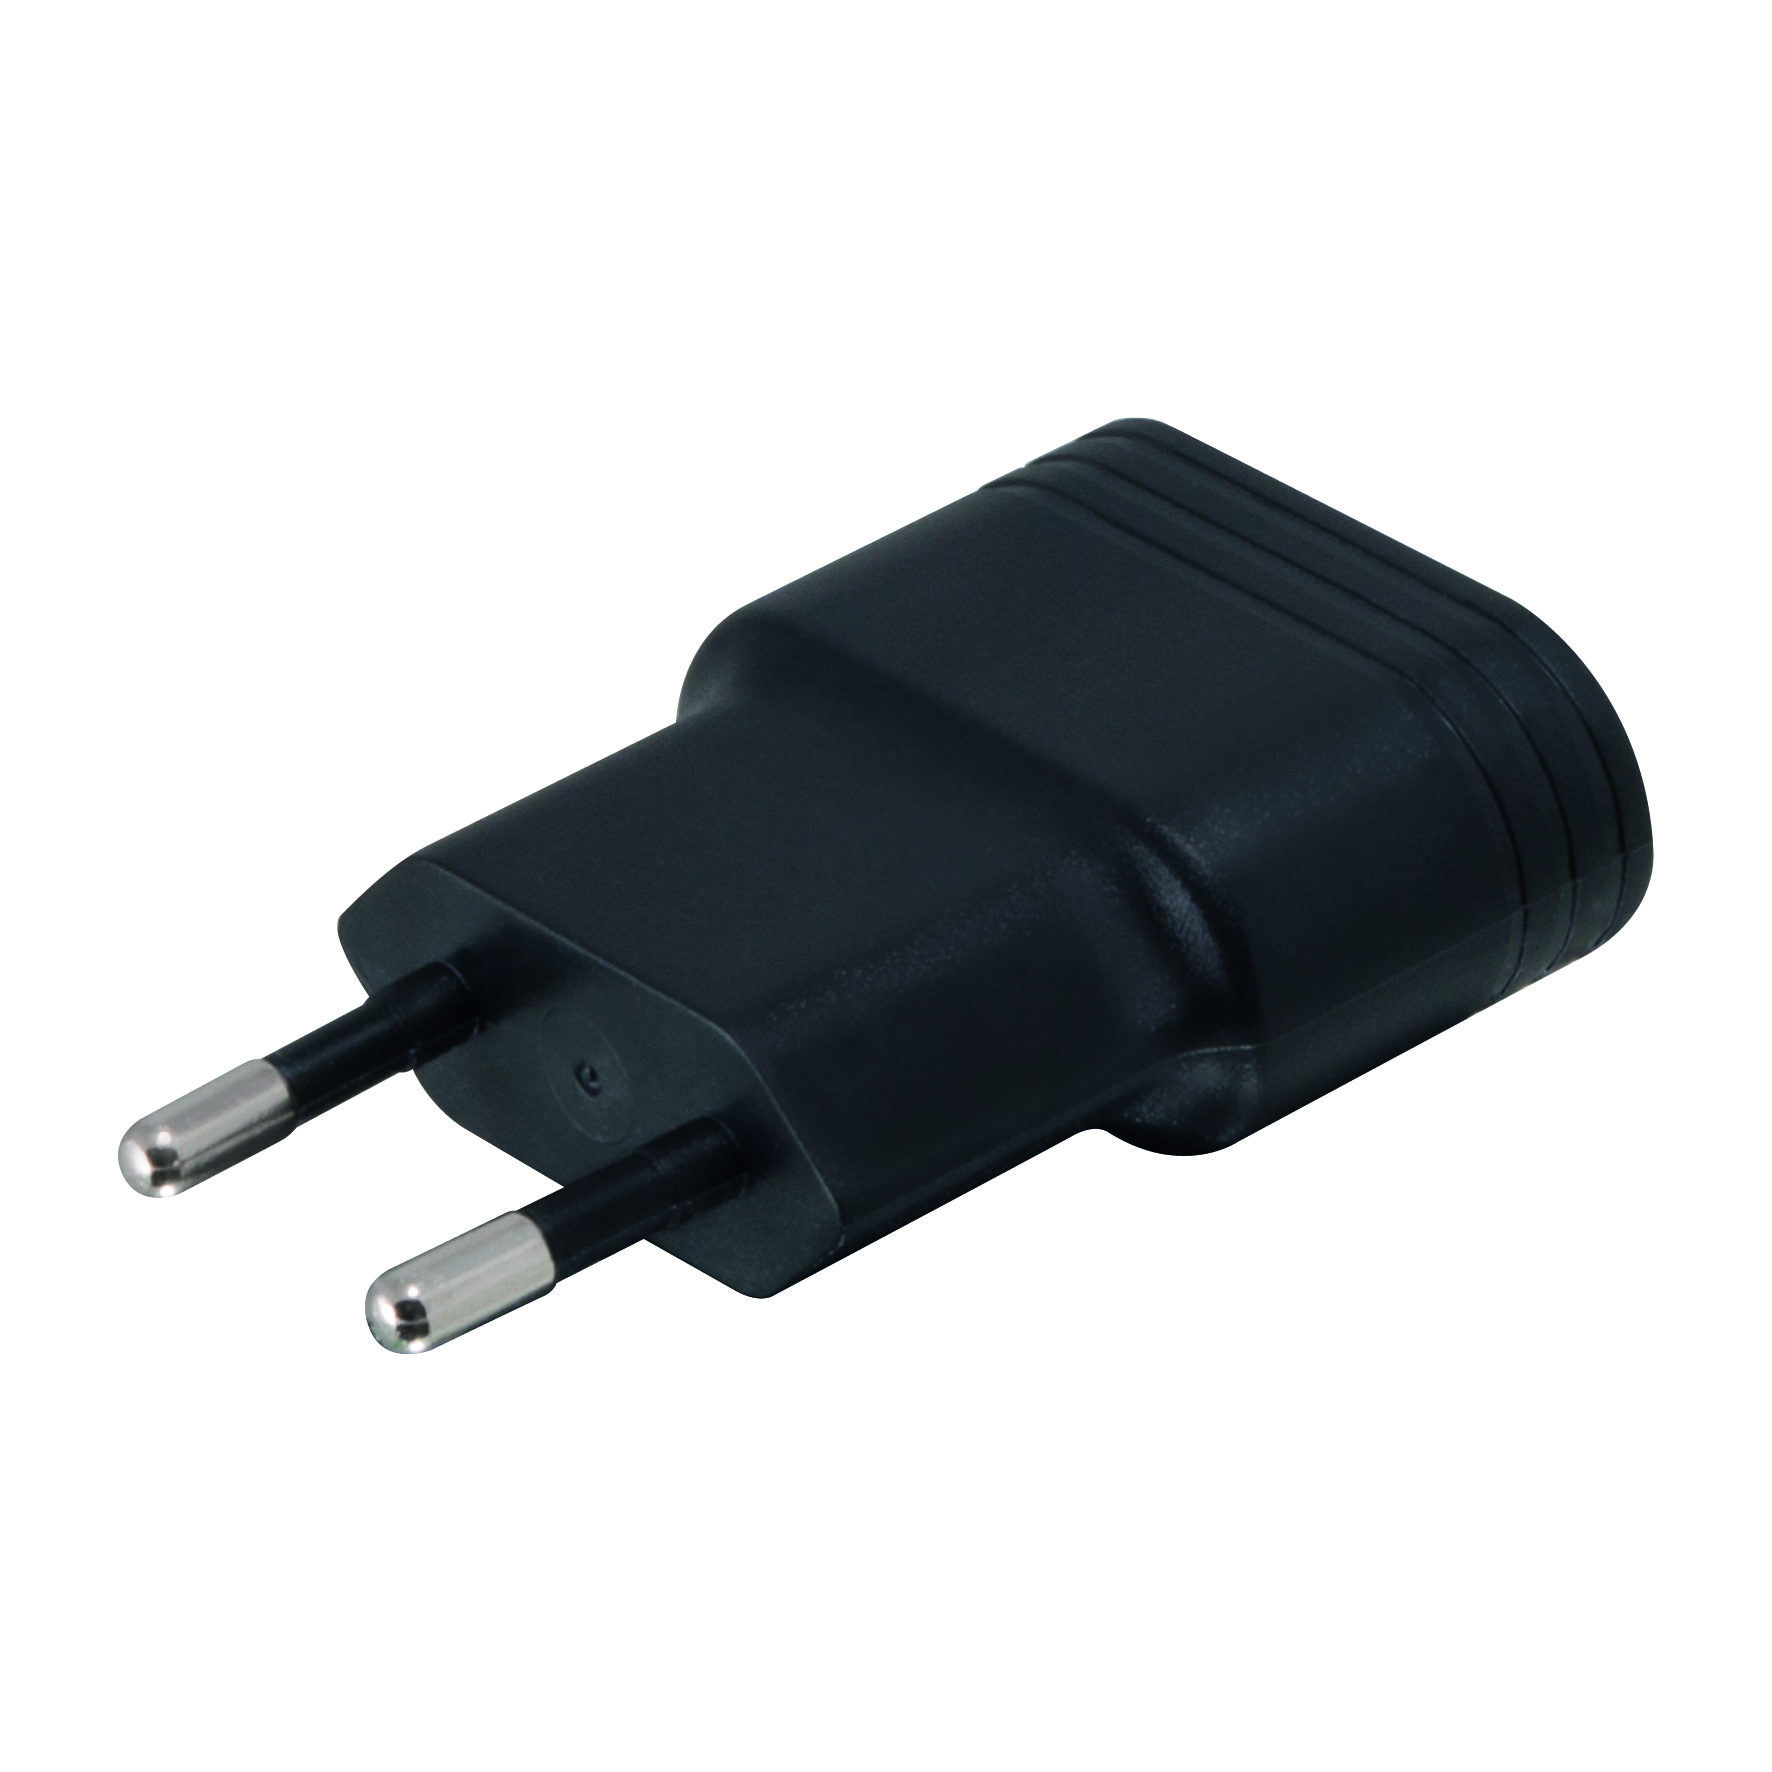
USB Charger
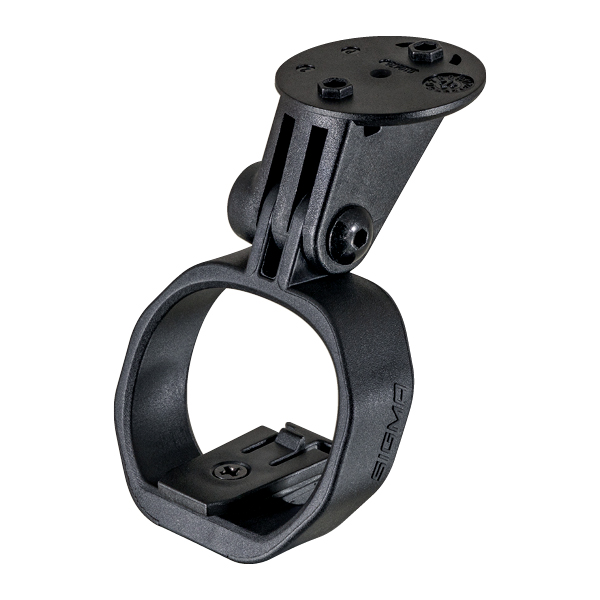
AURA 100 Out-Front Mount GoPro
- 1


